You don’t need a full toolbox or expert skills to handle a few easy home repairs yourself. With the right basic tools and a calm approach, you can tighten a loose hinge, fix a tiny drywall ding, or stop a squeak that’s been driving you a little crazy. Start with the simplest jobs first, because that builds confidence fast. Next, you’ll want to know which repairs are safe, which supplies to keep close, and when a pro is the smarter call.
Choose the Easiest Repairs First
Start with the fixes that give you the biggest win for the least effort, because that keeps the job from feeling heavy right away. Build your priority checklist around small wins like a squeaky hinge, a loose knob, or a slow drain.
Next, do a quick skill assessment so you know what feels safe and simple. If you can tighten, lubricate, or patch, you’re probably ready.
Then pick one job that matches your comfort level and finish it before moving on. That steady pace helps you feel included in the work, not overwhelmed by it.
As you gain confidence, you can try slightly bigger repairs, but keep the first round easy. When you choose well, every fix feels like proof that you can handle your home.
Gather These Basic DIY Tools
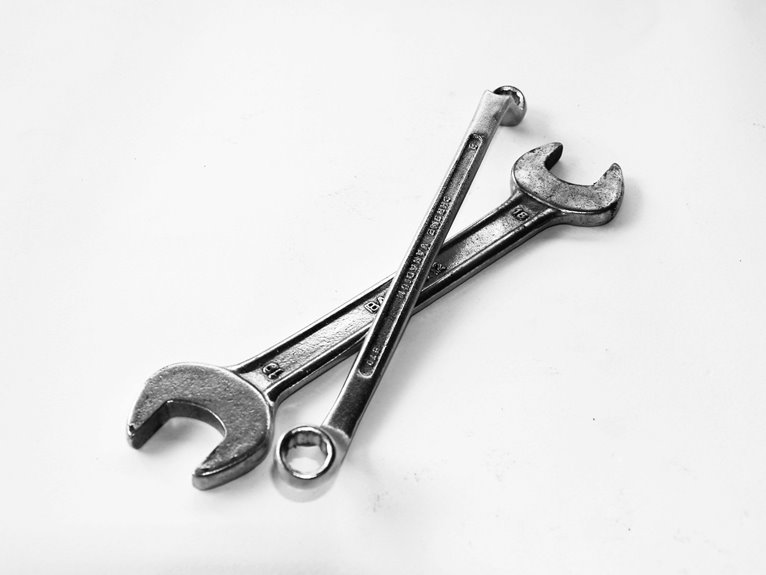
When you gather the right DIY tools, small repairs feel much less stressful and a lot more doable. Start with essential hand tools like screwdrivers, pliers, a hammer, a wrench, and a tape measure so you can handle common fixes with confidence.
Then keep a cordless drill and safety gear like gloves and safety glasses nearby, because the right setup helps you work faster and stay protected.
Essential Hand Tools
A sturdy toolbox can save you a lot of stress, because the right hand tools make small home repairs feel much less overwhelming. When you grab these basics, you join the club of capable homeowners who fix things without panic. Keep a claw hammer, tape measure, adjustable wrench, and needle nose pliers close by. Add precision screwdrivers for tight hardware, a utility knife for clean cuts, and a leather mallet when you need gentle taps. | Tool | Use |
| — | — |
|---|---|
| Hammer | Drive or pull small nails |
| Tape measure | Check fit before you cut |
| Pliers | Grip, bend, and twist parts |
| Precision screwdrivers | Tighten tiny screws |
| Leather mallet | Tap parts without damage |
With these tools ready, you can handle loose knobs, squeaks, and minor patches faster, and you’ll feel more at home in your own repairs.
Power Drill Basics
Now that you’ve got the hand tools covered, it’s time to add the tool that can speed up so many home fixes: the power drill. You’ll fit in fast when you know the basics, because this tool handles shelves, hardware, and small repairs with ease.
Start with these four essentials:
- Choose a cordless model for freedom and easy reach.
- Practice cordless safety by keeping the battery charged and the trigger controlled.
- Learn bit selection so you match the bit to the screw or hole.
- Use slow speed first, then increase it as needed.
When you hold the drill steady and let it do the work, you’ll feel more confident right away. That calm confidence helps you tackle repairs with the rest of your DIY crew.
Safety Gear Must-Haves
Safety should come first every single time you pick up a tool, because even small home repairs can surprise you fast. When you wear personal protective equipment, you join a smart crew that looks out for each other, even if you’re working solo. Start with safety glasses, sturdy gloves, and non-slip shoes, then add respiratory protection when dust, paint, or mold might float around.
| Gear | Why you need it | Best use |
|---|---|---|
| Safety glasses | Shields eyes | Drilling, sawing |
| Gloves | Protects hands | Sharp edges |
| Ear plugs | Cuts noise | Power tools |
| Mask | Supports respiratory protection | Dusty jobs |
| Knee pads | Eases pressure | Floor repairs |
Keep your gear nearby, checked, and ready. Then you can focus on the fix with more confidence and less worry.
Fix a Popped Nail Hole
Popped nail holes can make a wall look tired, but they’re usually quick to fix once you know what to do. You can handle this small repair with calm hands and a little patience, and your space will look cared for again.
First, brush away loose dust. Then, press a small amount of wood filler into the hole with a putty knife for smooth cosmetic touchups.
- Wipe the area clean.
- Fill the hole flush.
- Let it dry fully.
- Sand it lightly.
After that, check the surface under light so you catch any dip. If you see one, add a thin second coat and smooth it again. Then touch up the paint, and your wall blends back in with the room. That’s the kind of fix that makes your home feel truly yours.
Patch Small Drywall Holes
First, gather your patch supplies so you’ve got spackle, a putty knife, and fine-grit sandpaper ready before you start.
Then apply the spackle to the small hole, let it dry, and sand it smooth so the repair blends into the wall.
After that, you can add touch-up paint, and your wall will look like the hole was never there.
Gather Patch Supplies
Before you start patching a small drywall hole, gather everything you’ll need so the repair feels calm instead of chaotic. Your material checklist keeps you on track, and good storage solutions help you find each piece fast when you’re ready.
- Spackle
- Putty knife
- Sandpaper
- Clean cloth
Keep the items together in a small bin or zip bag, so you’re not hunting around the house. If you like, add painter’s tape and a scrap of cardboard to protect nearby spots.
When your supplies are ready, you can focus on the patch itself with less stress and more confidence. That little bit of prep makes you feel like part of the capable DIY crowd, and honestly, that’s a pretty nice club to join.
Sand And Paint
Now that the patch has dried, you can smooth it into the wall with sanding and finish the repair with paint. Start with fine-grit sandpaper and keep your hand light so you don’t nick the drywall around it. Wipe away dust with a damp cloth, because clean surface prep helps the paint stick. Then check the spot with your fingers and fix any rough edges.
Next, choose a paint that matches the room, and take a minute for color selection so the repair blends in. Use a small brush or roller and feather the edges outward. If the wall still shows a line, add a second thin coat. Soon, your patch will disappear, and you’ll feel right at home again.
Tighten Loose Hinges and Handles
A loose hinge or handle can make a door feel annoying fast, but you can usually fix it in minutes with a few simple tools. Grab a screwdriver and check each screw before you do anything else. If you want to tighten hinges, turn the screws until they sit snug, not stripped. Then look at handle alignment so the knob or pull sits straight and works smoothly.
- Open and close the door to spot the wobble.
- Tighten any backed-out screws.
- Add a longer screw if one hole feels worn.
- Test the swing and feel for grip.
When you do this, the door feels solid again, and you fit right back into a home that works with you, not against you.
Stop a Running Toilet
That nonstop toilet sound can wear on your nerves, but the fix is often simpler than it seems.
First, lift the tank lid and watch the toilet flapper. If it’s warped, dirty, or not sealing, clean it or replace it so water stops slipping through.
Next, check the water level. If it’s too high, lower the float until the water sits below the overflow tube.
Then make sure the chain has a little slack, not a tug, because a tight chain can keep the flapper open.
Also listen for a fill valve that keeps hissing after the tank fills.
With a few small adjustments, you can quiet the toilet and feel like you’ve got this handled, just like your own place should.
Replace a Showerhead Yourself
Swapping out a showerhead is one of those small fixes that can make your whole bathroom feel better fast. You don’t need a pro, just a wrench, plumber’s tape, and a little confidence.
First, twist off the old head by hand or with a cloth-wrapped wrench. Then clean the shower arm threads so the new seal grips well. Next, wrap the threads with tape and screw on your new water saving showerhead or a luxury rainhead for a nicer soak.
- Turn off the water first.
- Protect the finish with a cloth.
- Tighten until snug, not brutal.
- Test for leaks and adjust.
When you finish, you’ll feel like part of the weekend-fix crew, and that’s a pretty good club to join.
Unclog a Sink Drain
You can usually spot a sink clog by slow draining water, gurgling sounds, or standing water that won’t budge.
Start by checking the drain opening and then clear the sink trap, since that’s often where food, hair, and gunk collect.
If the clog stays stubborn, you still have a few easy ways to loosen it without turning your kitchen or bathroom into a science project.
Identify Drain Clog
A slow sink can quickly turn into a messy headache, so it helps to spot the clog early. You can usually catch trouble before it grows by watching how your sink behaves. Hair buildup often starts the problem, and slow drainage is the first clue.
- Watch for water pooling after you wash.
- Listen for gurgling when the drain runs.
- Notice if the sink smells musty or stale.
- Check whether only one basin drains poorly.
When you see these signs, act fast. You’re not alone in this, and a quick check can save your day. Use a flashlight and look at the drain opening. If debris sits near the top, you’ve likely found the clog’s home.
That small step helps you choose the right fix with less stress and more confidence.
Clear Sink Trap
Reach under the sink and clear the trap with care, because this small bend in the pipe often hides the real clog.
Place a bucket below it, then loosen the slip nuts by hand or with pliers.
If you see hair, grease, or food bits, pull them out and rinse the trap clean.
Check the washer while you’re there, because a tired seal can cause leaks and stink.
If the trap still looks damaged, a p trap replacement may save you trouble later.
Tighten everything snugly, run warm water, and watch for drips.
For better odor elimination, wipe the area dry and clean the pipe threads before reassembly.
You’ve got this, and your sink can feel fresh again.
Seal Drafty Windows and Doors
Drafty windows and doors can sneak cold air into your home and quietly drive up your energy bills, but sealing them doesn’t have to feel like a big project. You can make your space feel cozier fast, and you’ll notice the difference right away. Start with a quick check, then use simple fixes that fit your budget and your weekend.
- Hold a hand near the frame to find leaks.
- Add insulating film to windows that feel chilly.
- Press rope caulking into small gaps around edges.
- Replace worn weather stripping so the seal holds.
When you take these steps, you help your home work with you, not against you. That means fewer drafts, more comfort, and a place that feels warm and cared for.
Repair a Squeaky Door
That squeak can get under your skin fast, but the fix is usually simple and quick.
First, open and close the door a few times to find the noisy hinge. Then wipe away dust so the lubricant can work well. You can spray a small amount of WD-40, or try lubricant alternatives like petroleum jelly if that’s what you have on hand. Next, swing the door back and forth to spread it into the hinge.
If the sound stays, tighten the hinge screws with a screwdriver. When a hinge is bent or worn out, hinge replacement may be the best move.
With a few basic tools, you can quiet the door and feel proud of a smooth, friendly home again.
Reset a Tripped GFCI Outlet Safely
When a GFCI outlet trips, it can feel a little alarming, but the reset is usually simple once you know what to look for.
First, unplug nearby devices so you can reset with confidence. Then press the outlet’s RESET button firmly. If it stays in, plug items back in one at a time. If it trips again, pause and check for moisture, damaged cords, or a busy circuit.
Good outlet placement matters too, especially near sinks, garages, or outdoor spots. Use GFCI testing monthly to keep your home safer and to spot problems early.
- Find the outlet.
- Press TEST.
- Press RESET.
- Watch for a steady power return.
Refresh Old Caulk and Grout
After you’ve checked a stubborn GFCI outlet, it’s a good time to look at other small fixes that can make a room feel cleaner and better cared for.
You can refresh old caulk and grout with a little patience and the right cleaner. First, scrub the joint to handle mildew removal, then let it dry fully.
Next, cut away cracked caulk and apply a smooth new bead that fits the line. For grout, choose a matching color matching sealer or stain so the repair blends in instead of shouting for attention.
Work slowly around tubs, sinks, and tile edges, and wipe away extra before it sets. When you finish, the whole space feels neater, and you get that quiet win every neighbor loves.
Know When It’s Time to Call a Pro
Sometimes a repair looks simple, but it can hide a bigger problem, so it helps to know your limits before you tackle it. You’re not backing out; you’re protecting your home and your peace of mind.
Call a pro when you see:
- Water stains that keep spreading
- Cracks that grow after patching
- Wiring that sparks, buzzes, or smells hot
- A leak that returns after you tighten it
A licensed expert can give you a professional assessment and catch damage you might miss. That matters when liability concerns could follow, especially with electrical, plumbing, or structural issues.
If a job feels risky, you don’t need to push through alone. Getting help can save time, cut stress, and keep your space safe for everyone who lives there.
Frequently Asked Questions
How Do I Fix a Squeaky Door Hinge Without Replacing It?
You can quiet it quickly. Spray WD 40 on the hinge or coat the pin with petroleum jelly, then open and close the door several times. If the squeak remains, tighten the hinge screws and check for a loose pin. Using the right lubricant usually stops the noise.
What’s the Safest Way to Remove a Stubborn Drain Clog?
Start with a plunger, then use an enzyme based drain cleaner if the clog stays put. This approach helps protect your pipes, skips harsh chemicals, and keeps your kitchen or bathroom drain working properly, so you can handle the problem with confidence.
Which Tools Should Every Beginner DIY Homeowner Buy First?
Start with a hammer, tape measure, pliers, and utility knife; they handle most basic fixes. Then add screwdrivers, a wrench, and safety glasses so you are ready for common household tasks.
How Can I Patch a Cracked Drywall Seam Before Painting?
Clean the seam, press joint compound into the crack with a putty knife, embed joint tape or mesh for reinforcement, and build up thin feathered coats. Sand lightly between coats, then prime and paint. The repair will blend in cleanly and hold up well.
When Should I Stop a Repair and Call a Professional?
Stop the repair if you find exposed wiring, loose support, or damage that needs specialized tools. Call a professional before the problem grows or safety is at risk.