Need to tighten lug nuts without a torque wrench? You can, but only if you treat each nut like it matters, because one loose wheel can turn a quick fix into a bad day. Start with the right setup, then use a steady hand and a smart pattern so the wheel sits snug and even. The steps look simple, but the order is what keeps you safe and makes the difference when you roll out.
Know Your Lug Nut Torque Range
Torque matters more than guesswork, so before you tighten lug nuts without a torque wrench, you need a solid idea of the target range for your vehicle. Check the owner’s manual or trusted repair data for your exact model specifications, because even close cousins can differ.
You’ll usually see a range in foot-pounds, and that number keeps your wheels secure without stressing studs. If the chart lists aluminum wheels, pay extra attention, since they can need a different value.
Also, ambient temperature can nudge readings a little, so note the conditions if you’re working in extreme cold or heat. When you know the range, you can judge feel with confidence, stay calm, and work like you belong in the garage crew.
Gather the Right Hand Tools
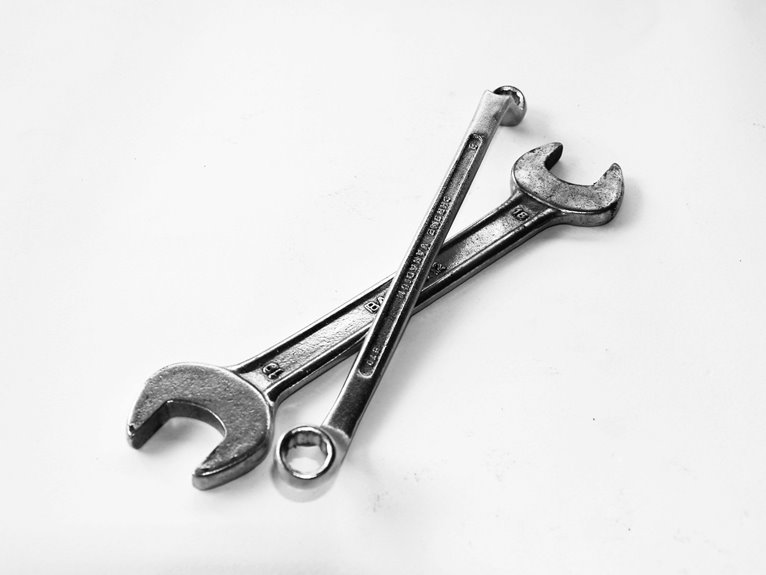
You’ll want a few basic hand tools ready before you start, including the right lug socket, a lug wrench, and a breaker bar for stubborn nuts.
It also helps to keep a wire brush nearby so you can clean the wheel and hub before the nuts go back on.
For safety, have a jack and jack stands ready too, because a steady car makes the whole job less stressful and a lot safer.
Basic Hand Tools
Start by gathering the few hand tools that make this job smooth and safe. You’ll want a socket set that matches your lug nut socket sizes, usually 17mm, 19mm, or 21mm, plus a sturdy lug wrench or breaker bar. Keep a clean wire brush nearby so you can clear rust and grit before you start. That little step helps each nut seat better and keeps you in the same crew of careful drivers who do things right.
Check your tools for wear, too, because wrench maintenance matters when you want steady grip and less slipping. If one socket feels loose, swap it out now. With the right fit, you can work faster, avoid damage, and feel more confident at the wheel.
Safety Supplies
Before you lift a wheel, gather the safety supplies that keep the job calm and under control.
Put on safety gloves so your hands stay clear of sharp edges, hot metal, and greasy slips.
Keep eye protection nearby, because rust and dirt can pop loose when you clean the hub.
Set a fire extinguisher within reach, even if you don’t expect trouble, since smart prep gives you room to breathe.
Also, use sturdy shoes and a bright light so you can move with confidence and see each lug clearly.
When you’ve got these basics ready, the rest of the work feels more organized, and you can focus on tightening each nut with steady care.
Park Safely and Loosen the Nuts
Park on firm, level ground and set the parking brake, because a stable car makes every step safer and easier.
Then place wheel chocks snugly behind the wheels that stay on the ground. You’re building a small safety team around your car, and that support matters.
Next, use the correct lug wrench and fit it fully on each nut. Turn each nut counterclockwise just a little at first, while the tire still carries full weight.
If one feels stuck, keep steady pressure and don’t jerk the wrench.
Loosen every nut only a half turn before lifting the vehicle. That way, you’ll be ready for the next step without fighting a spinning wheel later.
Clean the Studs and Lug Seats
Before you tighten anything, clean the studs and lug seats so dirt and rust don’t throw off the fit.
Wipe each lug seat until it’s smooth and clear, then inspect the threads closely for damage or grime.
This small step helps the nuts sit flat and thread on by hand the way they should.
Remove Dirt And Rust
Cleaning the wheel studs and lug seats is a small step, but it makes a big difference when you tighten lug nuts by hand. Take a wire brush or stiff cloth and clear away dirt, loose scale, and light rust from the stud threads and the wheel’s seat. That rust removal helps the nut pull the wheel down evenly, and it also supports paint preservation on coated wheels because you can work carefully instead of scraping harder than needed.
You’re not trying to make parts shiny, just clean and dry. Wipe off the dust, then check the lug seat surface for any grit that could keep the wheel from sitting flat. When everything feels smooth, you’ll get a better fit, and your crew of one can tighten with more confidence.
Inspect Threads Carefully
As you inspect the threads, take a close look at every stud and lug seat so you know the parts can clamp down the wheel the way they should. This thread inspection helps you spot damage before you tighten anything.
Look for stretched threads, burrs, rust pits, and bent studs. Then check the lug seats for cracks or shiny wear indicators that hint at poor contact. If a nut catches, backs off oddly, or feels rough, stop and compare it with the others. You want each fastener to move smoothly by hand, because that gives you a safer, tighter fit. Clean pieces work together better, and that makes you feel more confident when the wheel goes back on.
Wipe Lug Seats Clean
A clean mating surface makes the whole wheel job go smoother, so now’s the time to wipe the lug seats and studs until they’re free of grit, rust dust, and old road grime. You help the wheel sit flat when you keep wheel cleanliness front and center. Use a wire brush or rag, then check each stud and cone seat by touch and sight.
If you feel flakes or sticky buildup, work them off before the nut goes back on. This small step supports corrosion prevention too, since trapped moisture and salt can keep eating the metal. As you clean, stay calm and steady. You’re building the kind of fit that feels right, tight, and safe, like you belong under that wheel well.
Tighten Lug Nuts by Hand
Get a firm hand on the wrench and tighten each lug nut by feel, not by force. You’re building trust in your grip, and that matters. Use hand tightening techniques to guide the nut until it sits snug and the wheel feels settled. Then add small turns with steady pressure. With fingertip torque awareness, you can sense when resistance rises and stop before you strain the threads.
| Feel | Action |
|---|---|
| Loose | Turn gently |
| Snug | Pause and check |
| Firm | Add a small pull |
| Too hard | Stop right away |
Stay calm, stay smooth, and let your hands do the listening. If a nut fights you, back off and reset it. That’s how you fit in with the safe, steady crew.
Tighten Them in a Star Pattern
Usually, you want to tighten lug nuts in a star pattern so the wheel seats evenly and stays true on the hub. You’ll move from one nut to the opposite one, then keep crossing over until every nut feels snug.
This even pull helps with wheel balancing and lowers the chance of a wobble later. If you spot hub corrosion, clean it first, because rough buildup can keep the wheel from sitting flat.
Then give each lug a little more turn in the same star order. That steady rhythm helps you join the wheel to the hub like a team.
If one nut feels stubborn, don’t force it alone. Keep the pattern, stay patient, and let each lug share the load.
Use Body Weight for Even Pressure
You can use your body weight to make the pull smooth and steady, not jerky.
Keep the wrench in a cross pattern so each lug gets the same pressure as you move around the wheel. That even push helps the lug nuts seat flat and keeps the wheel snug against the hub.
Controlled Foot Pressure
Stand in a metered stance, brace your core, and keep one hand firm on the wrench. Then lean in slowly until the nut feels snug. This helps you share force across the wheel without a harsh jerk.
If your balance shifts, step back and reset before trying again. Small, controlled moves give you better feel and protect the threads. You’re not chasing brute force here. You’re aiming for that solid, trusted click-free finish that tells you the wheel feels right.
Cross Pattern Tightening
With your foot pressure steady, the cross pattern keeps that force spread evenly across the wheel.
You move from one lug nut to the opposite one, then keep going in that alternating sequence.
This criss cross technique helps you feel part of the job, not fighting it alone.
Because you tighten one nut, then its far partner, the wheel settles in a balanced way.
Use your body weight on the wrench, but stay smooth and controlled.
After each pass, go around again and give each nut another firm turn.
That rhythm builds trust in your hands and keeps the load shared.
If one nut feels snug sooner, don’t chase it hard.
Just return to the pattern and let the group work together.
Even Lug Seating
Often, the wheel seats best when you let your body weight do the work in a smooth, steady way. You’re not trying to muscle each nut down like a superhero. Instead, lean on the wrench so the wheel hub pulls snug against the contact surface with even pressure. This helps the wheel settle flat, and it keeps one lug from stealing the show.
Move in your star pattern, then give each nut a little more pressure in the same order. If a nut feels off, back it off and start again. You want the wheel to sit true, not wobble like it’s late for dinner. That steady feel gives you confidence, and it helps your ride stay secure.
How Tight Is Too Tight?
Too tight starts when the lug nut stops feeling snug and starts feeling forced. You want firm resistance, not a hard stop that makes you strain. If you keep leaning after that point, you risk excessive clamping, and that can lead to stud fatigue over time.
Check for Wheel-Specific Torque Needs
Some wheels need a specific torque, and that’s where you should slow down and check the details before you rely on hand feel alone. You’re not guessing alone here; you’re matching your car to its wheel specifics and staying within manufacturer recommendations. That helps you fit in with the right crowd of careful drivers.
- Look at the wheel manual or label for torque notes.
- Check if alloy, steel, or aftermarket wheels change the target.
- Match stud size and seat style to the listed value.
- Use the safest number when the specs differ.
When you follow these details, you protect the wheel, the hub, and your own peace of mind. It also makes your work feel steady and trusted, not rushed and shaky.
Recheck Lug Nuts After a Short Drive
After a short drive, you should recheck the lug nuts because the wheel can settle a little once the car starts rolling. Stop on level ground, set the parking brake, and give each nut a firm touch in the same star pattern you used before.
This short test helps you catch anything that loosened as the parts warmed up and settled together. If one nut feels off, bring it back to the same snug feel as the others.
While you’re there, do a quick vibration check by listening and feeling for anything unusual on the road and at low speed. That simple extra step helps you feel confident, and it keeps you and your crew on the same page before the next trip.
Common Lug Nut Mistakes to Avoid
One of the easiest ways to make a lug nut problem worse is to rush the job and trust your hand more than the wheel. When you work with your crew mindset, you protect the fit and keep stress low.
- Don’t use incorrect socket sizing, or you’ll round the nut and make grip feel shaky.
- Don’t chase tightness with brute force, because overtightening consequences can crack studs and make future removal miserable.
- Don’t skip the star pattern, since uneven pulls can leave the wheel sitting wrong.
- Don’t ignore dirty threads, because rust and grit can fool your hands into thinking the nut is snug.
If you slow down, you’ll feel the difference and keep the wheel secure without drama.
When to Stop and Find a Torque Wrench
If you’ve already cleaned the hub, hand-threaded the nuts, and tightened them in a star pattern, you still need to know when to stop and grab a torque wrench. If the wheel is for daily driving, safety matters more than pride, and you should seek help if you’re unsure. A torque wrench gives you a clear target when your hand feel starts to wobble.
| When to stop | What to do |
|---|---|
| You feel unsure | Borrow wrench from a friend or parts store |
| The wheel is an alloy | Use proper torque, not guesswork |
| You’re working on a family car | Double-check with a torque wrench |
That little tool can save your group from stress later. If you can’t get one, pause and borrow wrench before you call it done.
Signs Your Lug Nuts Need Retorquing
Even when you’ve tightened the lug nuts by feel, your work can still shift a little after the first drive, and that’s why retorquing matters.
You belong with the drivers who check for small changes before they grow into bigger problems. Watch for these signs:
- A new wobble or steering shake after the wheels have settled.
- Clicking, popping, or a faint clunk near the wheel.
- Visible gaps between the wheel and hub or lug nuts that look uneven.
- Vibration warnings, pulling, or irregular wear on the tire tread.
If one wheel feels off, check all of them right away. Your car often tells you when a fit has relaxed, and a quick recheck can keep you confident on the road and in the crew.
Drive Carefully Until You Can Torque Them
Drive to the nearest shop or tire bay as soon as you can, and keep your speed low so the wheel stays calm.
Avoid hard braking, sharp turns, and rough roads, because your lug nuts still need a proper torque check.
Once you’re there, ask them to recheck the torque right away so you can drive with peace of mind.
Drive To Nearest Shop
Once the lug nuts feel evenly snug, the safest next move is to head straight to the nearest shop and have them torqued properly. You’re not being extra; you’re protecting your ride and everyone in it.
Keep your speed calm, skip hard braking, and avoid sharp turns. If the shop is far or you feel shaking, call a tow service instead.
- Choose the shortest route with smooth roads.
- Stop only for a quick fuel stop if you must.
- Park in a safe, level spot when you arrive.
- Ask for a proper torque check right away.
That quick visit gives you peace of mind and lets you drive with the same confidence your crew would want for you.
Recheck Torque Soon
After you get rolling again, check the lug nuts soon so a loose one doesn’t sneak up on you later. Drive gently, skip hard stops, and listen for odd clicks or wobble.
Then do a post drive inspection when the wheel feels cool enough to touch. Put the wrench on each nut and give it a firm check in the same star pattern you used before. If one turns, snug the rest the same way.
You’re not chasing perfection here, just steady safety for you and your crew. Many drivers make this part of seasonal checks, which keeps the habit easy and calm.
Once you can torque them properly, use the right spec and settle in with confidence.
Frequently Asked Questions
Can I Reuse Lug Nuts After They’Ve Been Removed Several Times?
Yes, you can usually reuse lug nuts if the threads still look good, but check for wear and rust. Replace any damaged nuts, and make sure they thread on smoothly by hand without forcing them.
Does Wheel Size Change How Much Leverage I Should Use?
Yes, wheel diameter can change your leverage angle a bit, but it should not be the only factor you depend on. A larger wheel can feel easier to control, yet you still need a steady, star pattern pull for secure fit and safety.
Should I Tighten Lug Nuts Differently on Steel Versus Alloy Wheels?
No, you do not tighten lug nuts differently for steel versus alloy wheels. Use the same star pattern and tighten them evenly, but be a little more careful with alloy wheels to avoid damaging the threads. Recheck the lug nuts after the first drive.
Can Temperature Affect How Snug the Lug Nuts Feel?
Yes. Temperature can change how tight lug nuts feel. Hot parts expand, and cold parts contract, which can make them seem tighter or looser. Always tighten them in a star pattern and check them to keep the wheel secure.
Is It Okay to Tighten Lug Nuts While the Car Is on a Jack?
Yes. You can snug the lug nuts with the car on a jack if the wheel is still stable, the handbrake is set, and the other wheels are chocked. For final tightening, lower the car so the tire just touches the ground, then tighten the nuts in a star pattern to the correct torque.