Like a steady hand on a stubborn latch, you can install screw hooks without a drill and still get a secure hold if you start right. You’ll choose the proper hook, mark the spot with care, make a tiny starter hole by hand, then turn it in slowly until it bites cleanly. If the threads fight back, you’ll know how to ease the pressure and keep the hook true, so the finish feels solid instead of risky.
What You Need for Drill-Free Hook Installation?
Before you hang anything, it helps to gather the right tools so the job feels calm, not tricky.
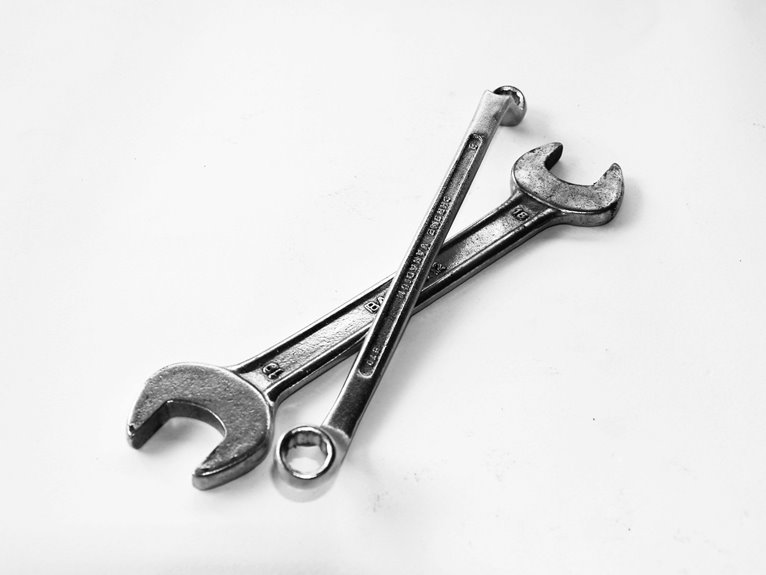
You’ll want the screw hooks, a pencil, a tape measure, and a sturdy pair of pliers for grip.
A small awl or nail can help start the hole, so your hand doesn’t slip and the wall stays neat.
Keep a level nearby if you want a tidy line that feels right in your space.
Choose hooks with corrosion protection for damp rooms, and look for decorative finishes that match your style.
Also, keep a cloth handy to wipe dust, plus work gloves if the surface feels rough.
With these basics ready, you can move in confidently and feel like you belong in the project.
Choose the Right Screw Hook Size
Choosing the right screw hook size makes the whole job safer and easier for you.
A hook that’s too small may bend or slip, while one that’s too large can make hand installation harder than it needs to be.
Match the hook size to the weight you want to hang so you get steady support without guessing.
Hook Size Matters
When you pick the right screw hook size, the whole job gets easier and a lot more secure. You’ll feel like you’ve got a smart plan, not a guess. A hook that’s too small can look awkward and throw off the hook aesthetics, while one that’s too large can split the surface or twist badly.
Match Weight Capacity
A strong screw hook should match the weight you plan to hang, not just the space you have. When you choose one, think about the item, the wall, and a little extra margin so you and your setup stay safe. Check load charts before you buy, because they tell you how much each size can hold. Then do simple weight testing with a known object if you can.
| Hook size | Typical use |
|---|---|
| Small | Light keys or decor |
| Medium | Plants or bags |
| Large | Heavier tools or baskets |
If your item feels close to the limit, move up one size. That small step helps you feel at ease and keeps your hook working like part of your home team.
Mark the Hook Placement Accurately
Before you put in the hook, mark the exact spot with care so the whole job starts off right.
You want accurate placement, because even a small shift can make the hook look off and feel awkward.
Hold the hook against the surface and check visual alignment with nearby lines, edges, or objects you plan to hang.
If you’re placing more than one hook, keep their spacing even so the setup feels calm and tidy.
A pencil mark works best because it’s easy to see and easy to adjust if needed.
Step back once before you move on, and trust that quick glance.
You’re not just marking a point; you’re making sure the space feels like yours and the hook fits in naturally.
Make a Starter Hole by Hand
Now that your mark is set, you can make a small starter hole by hand to give the screw hook a safe path in. Use awl, nail, or other hand tools, and keep steady pressure so you don’t split the surface. A starter hole helps you feel in control, and that matters when you’re working alone or with friends nearby. Put on work gloves for skin protection, then hold the tip at the mark and turn or tap gently.
| Tool | Best use | Tip |
|---|---|---|
| Awl | Soft wood | Press slowly |
| Nail | Light pilot point | Tap lightly |
| Screwdriver tip | Very small dent | Twist carefully |
If the material feels hard, stop and check your spot. Your careful start makes the next step easier and safer for everyone around you.
Twist Screw Hooks in by Hand
Mark your pilot point first so the hook starts where you want it and doesn’t wander off course.
Then grip the hook with pliers and begin twisting it in by hand, which gives you better control and saves your fingers from a tiny workout.
Keep checking that the hook stays straight as you turn it, because a steady line now makes the rest of the job much easier.
Mark Pilot Point
A tiny twist can save a lot of hassle here. You mark the pilot point where the hook should start, then check sight alignment so the hook stays straight and friendly to the wall. This tiny prep helps you feel in control, not rushed, and it keeps the hook from wandering when you turn it by hand.
- Hold the hook where you want it.
- Tap a small pilot mark with a pencil.
- Match the hook to your sight alignment.
- Recheck the spot before you twist.
When the mark looks right, you can press the tip in gently and begin the turn. That small pause builds confidence, and it helps you join the people who hang things neatly the first time.
Start With Pliers
Grip the screw hook with pliers and you’ll feel the job get much easier right away.
Use needle nose pliers first if the hook is small, because they give you a tight hold and help you start the twist cleanly. Then switch to locking pliers when you want more grip and less slipping.
Squeeze firmly, but don’t crush the metal. Turn the hook by hand as far as you can, then let the pliers finish the first few turns. This keeps your fingers safer and gives you better control.
If the hook starts to fight back, pause and reset your grip. You’re not behind; you’re just giving the hook a smarter start. With steady pressure and a calm pace, you’ll feel more in control fast.
Keep Hooks Straight
Keeping the hook straight matters more than it first looks, because a crooked start can throw off the whole job. You want the screw to bite evenly, so use visual guides like the mark you made and the edge of the surface. That helps you judge angle alignment before you twist. If the hook leans, stop and reset it right away. A small correction now saves a wobbly hook later.
- Hold the hook with steady fingers.
- Check the tip against your mark.
- Turn it a little, then pause.
- Look from two sides for balance.
As you work, keep your wrist calm and let the hook feed in slowly. That way, you stay in control and fit right in with the crew who gets it done cleanly.
Use Pliers for a Better Grip
When the screw starts to slip or feel stubborn, grab a pair of pliers and let them do the heavy lifting for your hands.
Choose needle nose pliers for tight spots, because their slim tips give you control without crowding the hook. If your pliers have rubber grips, hold them there too, since they keep your hand steady and help you squeeze with less strain.
Then clamp the hook shaft firmly, turn it slowly, and keep the pressure even so the threads bite cleanly. If the hook feels stuck, reset your grip instead of forcing it. That small pause can save your fingers and protect the hardware.
With a calm grip and a steady wrist, you’ll feel more in control and get the job done with less fuss.
Install Screw Hooks in Wood, Drywall, and Masonry
You can mount screw hooks in wood, drywall, and masonry, but each surface needs a different touch.
In wood, you’ll get the cleanest result by starting a small pilot hole or easing the hook in by hand so the threads bite well.
For drywall and masonry, you’ll need anchors or a set method that matches the wall so your hook stays firm and safe.
Wood Installation Tips
Wood can be the easiest place to install a screw hook without a drill, but it still pays to take a careful approach. You want the hook to grip cleanly, so start by checking the wood grain and choosing a spot away from knots or splits. If the surface feels rough, a little finish sanding helps the hook start straighter and sit tighter.
- Mark the spot with a pencil.
- Twist the hook in by hand with firm pressure.
- Back it out if it starts to wander.
- Reinsert it slowly until only the eye shows.
When you move at this pace, you protect the wood and make the hook feel steady, which helps your space look neat and welcoming.
Masonry And Drywall Methods
For drywall and masonry, the same careful idea still applies, but the wall surface asks for a little more patience and the right support. You can’t just twist a hook into these materials and hope for the best.
First, mark your spot, then choose drywall anchors or masonry anchors that match the wall and the weight you plan to hang. Push the anchor in straight, or tap it gently until it sits flush.
Next, turn the screw hook slowly so it bites cleanly and stays steady. If the surface feels crumbly, stop and reset before it loosens more.
With the right anchor, you give your hook a firm grip, and you keep your space safe, neat, and ready for everyday use.
Keep Screw Hooks Straight and Secure
Keeping a screw hook straight starts before the hook even goes in, because a tiny tilt at the start can turn into a crooked hook that feels loose later. You want to feel steady and confident, like you’re part of a job well done.
Guide the hook with your fingertips, then check its path often so the tip stays true.
- Mark the entry point clearly.
- Start with gentle pressure.
- Watch thread alignment as you turn.
- Use torque control, not force.
If the hook begins to wander, pause and reset it before it digs deeper. That small correction helps you keep the hook secure and neat.
When you move slowly, you protect the surface and build a stronger hold.
Fix Tight Spots and Stubborn Hook Threads
If the hook starts to bind, don’t force it, because that usually means the threads need a little help. You’re not doing anything wrong; tight threads often need a calmer touch. Back the hook out a quarter turn, then ease it forward again so the metal can settle.
If you feel gritty resistance, pause and clear the stubborn spots with a cloth, a pin, or a dab of wax on the tip. That small bit of slip can make the path smoother. You can also twist with steady pressure instead of a quick push, which helps the hook bite evenly.
Keep your grip firm and your wrist relaxed. When the hook moves in cleanly, you’ll feel the difference right away, and that’s your cue to keep the same smooth pace.
Test the Hook Before Hanging Weight
Now, give the hook a gentle test before you trust it with weight. Hold it, tug it, and feel for any wobble or slip. This quick check helps you join the group of careful DIYers who value secure results.
- Hang a light item first and watch the hook closely.
- Apply steady pressure for a few seconds during load testing.
- Look for movement at the threads and around the surface.
- Repeat your safety checks before adding anything heavier.
If the hook stays firm, you can move ahead with confidence. If it shifts, stop and reset it before you add more. That small pause keeps your space safer and your setup stronger.
Avoid Common Screw Hook Mistakes
A solid test can still go wrong when small mistakes sneak in, so it helps to know what to avoid before you trust the hook for real weight. You belong to a careful crew when you check the surface, match the hook size, and turn it in with steady pressure. Don’t force it, because over tightening damage can split the material and weaken your hold. Also, keep your spacing honest so one hook doesn’t crowd another and create incorrect spacing.
| Mistake | Better move |
|---|---|
| Loose start | Twist slowly and keep it straight |
| Over tightening | Stop when it feels firm |
| Incorrect spacing | Leave room for each hook |
When you skip these traps, your setup feels safer, cleaner, and a lot more confident.
Maintain Screw Hooks for Long-Term Hold
To keep screw hooks holding strong over time, check them every so often and give them a quick once-over with your hand and eyes. You’ll stay ahead of tiny problems before they turn into loose hooks or dropped items. Regular periodic inspections help you spot shifting, wear, or wobble fast, so your space keeps feeling dependable.
- Tighten the hook gently if it starts to turn.
- Wipe away dust and moisture for corrosion prevention.
- Replace bent or rusted hooks before they fail.
- Test the load lightly after any change.
When you care for your hooks, you protect your setup and your peace of mind. That little bit of attention helps your home stay sturdy, safe, and ready for everyday use.
Frequently Asked Questions
Can Screw Hooks Be Removed Without Damaging the Surface?
Yes, you can often remove screw hooks cleanly if you turn them slowly and support the surface. To protect painted surfaces, use gentle leverage, then fill and touch up any tiny hole.
Do Screw Hooks Rust in Humid Rooms?
Yes, screw hooks can rust in humid rooms. Choose stainless steel or coated hooks and inspect them often to catch early corrosion.
How Much Weight Can a Screw Hook Hold?
A screw hook can hold anywhere from a few pounds to more than 100 pounds, depending on the hook’s load rating and thread strength. Choose one that matches the weight you plan to hang so your items stay secure.
Are Screw Hooks Reusable After Removal?
Yes, you can reuse screw hooks if the threads are still sharp, the shank is straight, and the hook matches the same material it was removed from. Check for bending, rust, or stripped threads before reinstalling it.
Can Decorative Hooks Replace Standard Screw Hooks?
Yes, decorative hooks can stand in for standard screw hooks when the finish and material suit the job. Make sure they can support the weight you plan to hang, so the result is both secure and visually pleasing.