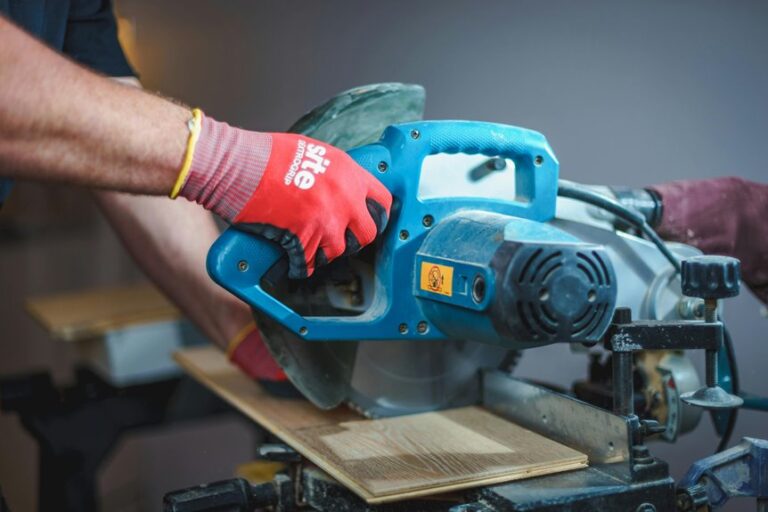
Yes, you can put a miter saw on the floor, but it’s not always the smartest move. If you’re working in a tight space or need a fast setup, it can get the job done, as long as the floor is flat, firm, and the saw stays steady. Still, floor use can throw off your cuts and your back, so the real question is when it’s worth the trade-off, and what you should do to keep it safe.
Can You Put a Miter Saw on the Floor?
Yes, you can put a miter saw on the floor, but it works best only in the right situation. You’ll do well with it for quick flooring cuts, trim work, or other short jobs where mobility matters. In portable workshops, this setup can save space and keep your tools close.
Still, you should place the saw on a level, solid surface so it stays steady and cuts stay true. Because floor height can make you bend more, ergonomic aids like a low stool or knee pad can help you feel less worn out.
For occasional use, this approach can fit your workflow nicely, especially in a garage or porch space. It’s a practical choice when you need speed, flexibility, and a setup that feels like it belongs with your project.
Why Floor Setup Can Be Unsafe
Putting a miter saw on the floor can seem handy, especially when you’re working on flooring or baseboards, but that setup can turn risky fast if you’re not careful. You bend low, and that can strain your back and make you rush. When you rush, you’re more likely to miss a cut or lose control.
A bare floor can also let the saw shift or wobble, which hurts accuracy and confidence. Then there’s the mess. Sawdust drops right at your feet, and airborne dust can hang around where you breathe. Cords, offcuts, and tools spread out on the ground can become a trip hazard too. So even if floor work feels familiar, it still needs extra care and attention.
How to Stabilize a Miter Saw on the Floor
You can steady a miter saw on the floor by starting with a flat, level surface and placing anti-slip pads under the feet. Then lock the saw’s base in place so it doesn’t shift when the blade starts moving.
A firm setup helps you cut with more confidence and less wobble, which makes the whole job feel a lot less sketchy.
Use Anti-Slip Pads
Often, the easiest way to calm a wobbly miter saw on the floor is to use anti-slip pads under the base. You’ll feel more in control, and your cuts can stay steadier on a smooth shop floor. Try these simple steps:
- Place anti vibration mats under each foot.
- Add grip enhancement tapes where the base touches down.
- Press the saw firmly, then test for tiny shifts.
These small layers help your saw stay put without much fuss, and they can make floor work feel less awkward.
If the floor has a hard finish, the extra grip matters even more. You’re not fighting the tool anymore, so you can join the cut with more confidence. That little boost can save your back and your mood.
Secure Saw Base
Lock the saw’s base in place before you make the first cut, because a solid footing changes everything. You can keep your setup steady with base anchoring, like bolting the feet to a plywood panel or clamping the plate to a firm board.
Next, check the floor for flat spots, then slip in shims if one corner rocks. This small step helps with vibration damping, so your blade tracks cleaner and your shoulders feel less stress.
If you’re working in a garage or on a porch, sweep away grit first, because debris steals grip fast. Then press the saw down, test a dry cut, and watch for movement. When the base stays quiet, you’ll feel more in control, and your cuts will match your plan.
When a Floor Setup Actually Makes Sense
A floor setup makes sense when the job is short, rough, and moving fast, such as laying flooring, trimming baseboards, or making a few clean cuts in a garage or porch.
In those moments, you can lean into temporary workshops and keep moving with low profile ergonomics that fit the pace.
- You save time when you only need a few cuts.
- You stay close to long boards and awkward trim pieces.
- You avoid dragging extra gear into the space.
That said, you’ll feel the bend in your back, so use this setup only when speed matters more than comfort.
If your floor is flat and solid, your saw can work well enough for the day, and you’ll still feel like part of the crew.
What Surfaces Work Best for a Miter Saw?
The best surface for a miter saw is flat, firm, and steady, because that’s what keeps your cuts clean and your setup calm. You’ll feel safer when the saw sits on stable concrete or a tight, level slab that doesn’t flex under pressure. If you’re working outside, temporary plywood on solid sawhorses can also do the job well.
| Surface | Fit |
|---|---|
| Stable concrete | Best for short setups |
| Temporary plywood | Good for portable work |
| Uneven dirt | Poor choice |
You want the saw to rest without wobble, since vibration can shake your line off target. That matters when you’re cutting with your crew, your tools, and your focus all in one place. A firm base helps you stay in rhythm and keeps the whole job feeling more under control.
How to Raise a Miter Saw for Safer Cuts
Once you’ve got your miter saw sitting on a steady surface, you can make it safer by bringing the cutting height up to a better level. You’ll stand straighter, see the blade path better, and feel less strain in your back and shoulders. That’s a win for you and anyone working nearby.
- Place the saw on ergonomic platforms that match your height.
- Use portable lifts when you need a quick, stable boost.
- Add a firm plywood top over sawhorses if you want a simple raised setup.
Keep the base locked down so it doesn’t shift while you cut. A small rise can turn a cramped floor setup into a more comfortable workspace, and that makes it easier for your crew to stay focused, steady, and confident.
Floor Setup Mistakes That Ruin Accuracy
If you set your miter saw on an uneven floor, the tool can shift just enough to throw off every cut.
You also lose accuracy fast when the saw doesn’t have solid support under it, since vibration and wobble work against you.
Even a small gap or soft spot can turn a careful setup into a frustrating mess.
Uneven Surface Problems
Even a small dip or wobble in the floor can throw off your miter saw faster than you’d expect. When you set the saw on an uneven spot, the base shifts and the blade no longer meets the wood at the angle you chose. That can create uneven vibration, noisy cuts, and edges that don’t line up.
You also need to watch floor drainage in garages or porches, because a sloped surface can pull the saw out of level.
- Check the floor with a straight board.
- Move the saw until all feet sit flat.
- Test a scrap cut before you start.
If the setup feels steady, you’ll work with more confidence, and your cuts will feel like part of the crew too.
Lack Of Support
A level floor can still let you down when the saw has nothing solid around it to brace against. If the base slides, rocks, or hangs off a soft edge, your cut line can drift fast.
You may tighten the blade, but tool limitations show up when the whole setup flexes. Add a board stop, a flat backer, or a sturdy side support so the saw feels planted.
Without that support, you fight vibration, and your hands work harder than they should. That creates ergonomic hazards, especially when you bend low and keep correcting each cut.
You deserve a setup that holds steady, so your measurements stay true and your work feels safer, calmer, and more in control.
Better Alternatives to Putting a Miter Saw on the Floor
When you’re ready to move past the floor setup, the best alternatives give you better comfort, cleaner cuts, and far less wobble.
You’ll fit right in with a safer, steadier workspace when you use:
- Portable stands, which lift the saw to a natural height.
- Sawhorses with a plywood top, which spread weight and calm vibration.
- Ergonomic lifts, which reduce bending and help your back stay happy.
These choices also keep dust off the ground and make it easier to follow long cuts with confidence.
If you work on flooring or baseboards, you can still stay mobile without kneeling all day like you’re fixing the world by hand.
Plus, a level support surface helps your saw stay accurate, so your cuts look cleaner and your setup feels more like a real shop.
Frequently Asked Questions
Can a Miter Saw Sit Directly on Concrete?
Yes, you can place a miter saw directly on concrete if the surface is level and stable. Use a moisture barrier and keep it away from freshly cured concrete. This can help reduce vibration, limit back strain, and cut down on dust spread.
Do All Miter Saw Models Have the Same Base Height?
No, you should not assume every miter saw has the same base height. Base height and footprint can vary from one model to another, so check your saw before setting it up. Measure carefully before you cut.
How Much Dust Does a Floor Setup Create?
A floor setup can produce a surprising amount of dust, especially on concrete or bare wood. Use cleanup strategies like a shop vac, tarp, and immediate sweeping after cuts to keep the area organized and shared.
Can Floor Placement Work for Outdoor Cutting?
Yes, you can. Outdoor cutting works best when the site blocks wind, softens noise, and gives you a level surface to place the floor.
What Tools Help With Irregular Cuts Alongside a Miter Saw?
Use a jigsaw for curved or irregular cuts and a miter saw for precise angled cuts. Add contour templates to copy tricky shapes, and you will have the right tools for more accurate results.