Nearly 60% of DIY brick cuts go wrong because the blade or setup isn’t right, so you’ll want to slow down before you squeeze the trigger. Yes, you can cut brick with a Skill saw if you use a diamond masonry blade, check the saw’s guard and cord, and clamp the brick so it can’t shift. Next, you’ll need to mark your line, make shallow passes, and keep dust and heat under control, because the clean cut usually comes from the prep you do before the first spark.
Can You Cut Brick With a Skill Saw?
Yes, you can cut brick with a Skill Saw if you use the right blade and handle the tool with care.
You’re not alone if that sounds a little bold, but it can work well for DIY jobs. Choose a masonry diamond blade, then mark your line clearly and let the saw move at its own pace.
Brick porosity can make dust and edges behave unevenly, so steady pressure matters. Also, thermal expansion can stress hot brick, so pause often and avoid forcing the cut.
Wear eye, ear, and breathing protection, because this job gets messy fast. With patience, you can make a clean cut and feel confident doing it.
What Blade Cuts Brick Best?
You’ll get the cleanest cut with a diamond masonry blade because it’s built to grind through brick instead of tearing at it.
If you need a cheaper option, abrasive cutoff wheels can work too, but they wear faster and make more dust.
The blade you choose should match your Skil saw and the cut you want, so you stay safer and get a smoother result.
Diamond Masonry Blades
Choosing the right blade makes all the difference when you cut brick, and a diamond masonry blade is the tool that does the job best. You get the cleanest cut because the diamond grit grinds hard clay and mortar instead of tearing them. That means better blade longevity, so you can keep working without swapping blades too soon.
Pick a blade that matches your saw size and has a hard bond for brick. Then use cooling techniques, like backing the blade out often, so it stays sharp and safer to use. When you mark your line and guide the saw slowly, the blade follows it with less chipping. With the right diamond blade, you feel more confident, and your cut looks like it belongs there.
Abrasive Cutoff Wheels
If a diamond masonry blade isn’t the right fit for your job, an abrasive cutoff wheel can seem like a quick fix, but it works very differently when you cut brick. You’ll get fast wear, more dust, and less control, so wheel compatibility matters before you start. Check the saw label, the wheel rating, and the arbor size.
- Match the wheel to your Skil saw
- Inspect cracks before each cut
- Use light pressure and short passes
- Plan abrasive maintenance after every job
This setup can help you make a few clean cuts, but it’s not the best choice for long projects. You’ll fit in better with the right gear, and your work will show it.
Gather Your Tools and Safety Gear
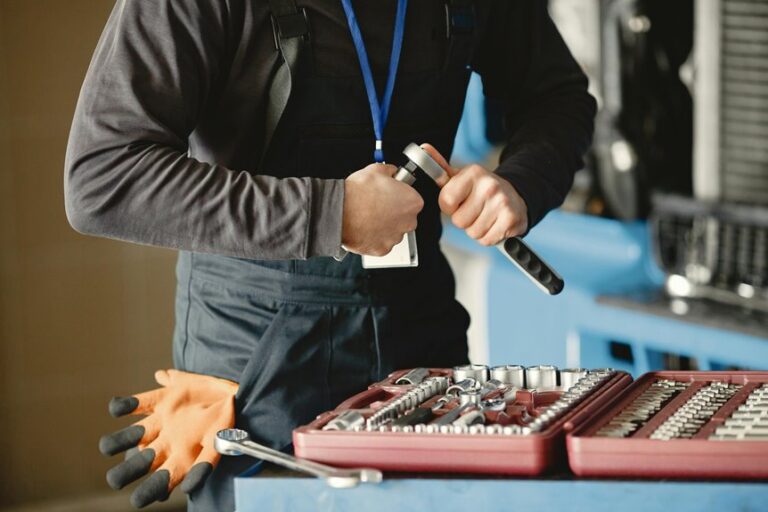
Before you start cutting brick, gather the right tools so the job feels steady and controlled. You’ll need your Skil saw, the correct diamond blade, and a clear mark on the brick, plus a square or straightedge if you want a clean line.
You should also put on eye protection, hearing protection, a respirator, and gloves, because brick dust and flying chips can ruin your day fast.
Required Cutting Tools
Gear up with the right tools, and the whole job gets a lot safer and smoother. You’ll need a Skil saw, a diamond masonry blade, a straightedge, a chalk line, and a clamp to steady the brick. Match the blade to the brick’s surface hardness, so you’re not fighting the material. Check tool maintenance before you start, because a loose guard or dull blade can ruin your cut fast.
- Diamond blade for masonry
- Measuring tape and chalk
- Straightedge or square
- Clamp and clean work area
When you gather these items, you set yourself up like the crew. You’ll work with more control, and each step feels less stressful. Keep everything within reach, then move into cutting with confidence and a steady hand.
Essential Safety Gear
A sharp blade and a steady saw are only part of the job, because the right safety gear keeps the whole cut under control.
You’ll want snug safety glasses, a face shield, hearing protection, gloves, and a respirator that fits well.
For face shield selection, pick one that covers your whole face and stays clear while you work.
A dust mask isn’t enough when brick dust starts flying.
Check respirator maintenance before every cut by cleaning the seals and swapping filters when they clog.
Wear long sleeves and sturdy shoes, too, so stray grit doesn’t bite you.
When you suit up with your crew’s mindset, you work smarter, stay calmer, and keep your focus on the cut instead of the mess.
Mark the Cut Line on the Brick
The cleanest brick cuts start with a clear, easy-to-follow mark, so take a moment to lay out the line carefully. You’ll feel more confident when your chalk placement is exact and your line visibility stays strong. Measure twice, then snap or draw the cut line where you want the blade to travel.
- Use a square for straight edges.
- Mark both sides of the brick.
- Keep the line bold and bright.
- Check the mark in good light.
If the line fades, refresh it before you start. A crisp mark helps you stay on track and cuts down on guesswork, which is what you want when you’re working with a saw. When your layout is clear, the whole job feels more manageable, and you’re less likely to drift off target.
Set Up the Skill Saw Safely
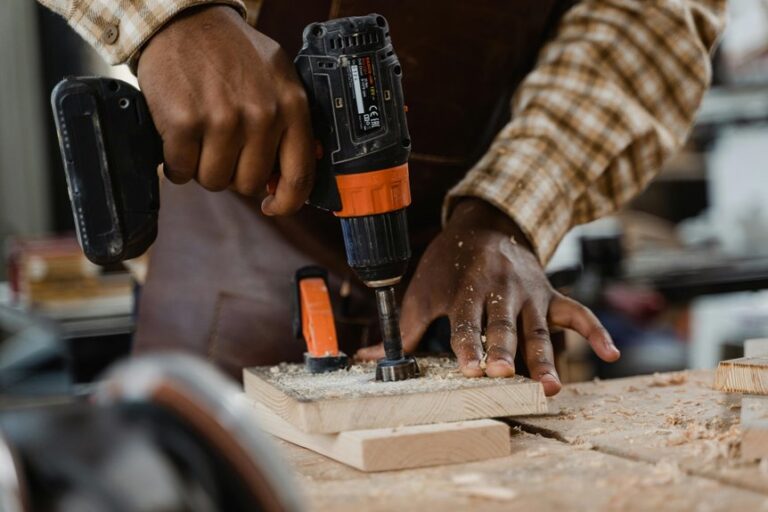
Clamp the brick in place and get your saw ready before you make the first cut. You’ll feel more in control when the workpiece stays steady and the blade stays true. Check that the diamond blade matches your saw size, then tighten it fully so nothing wobbles.
Next, clear your path and set strong workspace lighting so you can see the line without straining. Put on eye, ear, and hand protection, then start your dust suppression setup so the air stays calmer around you.
After that, inspect the saw cord, guard, and handle for damage. Keep your stance balanced, and make sure the brick sits on a firm surface. A little prep now helps you join the job with less stress and more confidence.
How to Cut Brick With a Skill Saw
Now that your saw is ready and the brick is secure, you can start the cut with a calm, steady motion. Line up the blade with your mark, then let it bite in slowly. You don’t need to force it; the diamond edge does the work while you guide the path. If you’re matching brick patterns, keep the line true so the finished piece fits in cleanly.
For longer cuts, make shallow passes instead of one deep push, and pause if the blade feels hot from thermal expansion.
- Hold the saw with both hands.
- Keep your body balanced.
- Follow the marked line closely.
- Let the blade finish each pass.
If the brick is thick, turn it and finish the cut from another side.
Control Dust and Flying Chips
Dust can kick up fast when you cut brick, so you’ll want to get ahead of it before it starts drifting everywhere. A good setup helps you feel in control, and that makes the job less stressful. Wear respiratory controls like a respirator, and keep bystanders back. Use chip containment with a tarp, cardboard shield, or plastic sheet to catch flying bits.
| Control | Use |
|---|---|
| Respirator | Keeps dust out of your lungs |
| Shielding | Blocks chips from spraying wide |
Also, mist the cut lightly if your saw and blade allow it, but don’t soak the area. Keep your stance steady, and clear the floor often so you don’t slip on grit. When you handle dust and chips well, you protect yourself and help everyone nearby feel safer too.
Make Straight, Clean Cuts
A steady cut starts with a steady setup, so take a moment to line things up before you squeeze the trigger. Mark your brick clearly, then keep the blade on that line with calm, even pressure. You’re not forcing it; you’re guiding it like a friend helping you stay on track.
- Use a square for true edges.
- Keep your hands steady and relaxed.
- Let the diamond blade do the work.
- Make light passes for thicker brick.
That slower approach helps you get a cleaner face for edge finishing and keeps the cut neat where joints meet. If the brick feels warm, pause and let it cool a bit, because thermal expansion can shift your line and rough up the edge. With patience, you’ll make cuts that look sharp and fit right in.
Avoid Cracks, Kickback, and Blade Damage
You can keep brick cuts clean by easing the blade into the work and letting it move at its own pace. If you force the saw, you raise the chance of cracks, kickback, and a tired blade that won’t stay sharp for long.
With a steady grip and a little patience, you’ll protect both the brick and your Skil saw.
Crack Prevention Tips
Even with a diamond blade, brick can still crack if the cut starts rough or the saw pushes too hard, so the key is to let the tool work at its own pace.
You’ll protect each brick better when you score the line first, then deepen it in light passes. That gives the material stress relief and helps you keep clean edges around expansion gaps.
- Mark a crisp line.
- Clamp the brick so it won’t shift.
- Start with a shallow pass.
- Let dust clear between cuts.
If the saw chatters, ease up and reset your grip. Keep your hands steady, and trust the blade to grind, not pry.
That simple rhythm helps you stay in the group of folks who get clean results without extra chips.
Kickback And Blade Care
Once the cut stays straight and the brick starts to respond, the next job is keeping the saw calm and the blade healthy. You do that by letting the diamond edge work at its own pace, not by forcing the tool. If you feel the saw tug, pause and reset your grip, because that pull can turn into sudden recoil fast.
Keep the shoe flat, clear dust often, and back the blade out if it starts to bind or heat up. Watch for blade wear too, since a dull rim chips brick and stresses the motor. Check the guard, clean the blade after each use, and replace it when the cutting edge looks glazed, uneven, or tired. That way, you stay safer and your cut stays cleaner.
When a Wet Saw Works Better
- You get less airborne dust.
- You reduce blade heat and wear.
- You improve control on long cuts.
- You make slurry management easier with a steady water flow.
If you’re working on a spot that people will see, a wet saw can save you stress and cleanup time.
It’s also a smart choice when you want your work to look like you belong on the job, not just near it.
Can a Skill Saw Cut Pavers Too?
Yes, a Skill Saw can cut pavers too, as long as you use the right diamond blade and treat the job with care. You can handle small patio fixes or driveway maintenance without feeling stuck, and that helps you keep the project in your own hands.
Mark your line clearly, secure the paver, and let the blade move at a steady pace. Don’t push hard, because the saw should do the work. For thicker pavers, make a few light passes instead of one rough cut.
Wear eye and dust protection, since the dust can get everywhere. Afterward, clean the edges and check the fit. If you plan surface sealing later, a neat cut helps the finish look sharp and cared for.
Cut Brick Around Corners and Openings
When you cut brick around corners and openings, start by measuring each side carefully so your line stays true.
Then mark window openings clearly and use those marks to guide tight, precise cuts in small spaces.
If the fit looks tricky, take it slow and let the saw do the work, because careful placement matters more than force here.
Measuring Corner Cuts
- Mark the outer edge first
- Record each leg of the corner
- Double-check notch measurement
- Keep your square tight
If the opening has a turn, measure the notch from both directions and compare them. That way, you avoid a piece that’s too tight or too loose.
When your numbers match, you can trust the cut and move ahead with calm.
Marking Window Openings
Marking a window opening takes the guesswork out of cutting brick, and it starts with the measurements you already checked for the corner. You belong in this part of the job when you map the window layout with a tape, square, and chalk line. Mark the sides, top, and sill, then note lintel placement so your cut stays where the frame needs support.
| Mark | Tool | Why it helps |
|---|---|---|
| Left edge | Tape | Sets width |
| Right edge | Square | Keeps lines true |
| Top edge | Chalk | Shows height |
| Sill line | Pencil | Stays easy to see |
| Lintel line | Marker | Guides support zone |
Double-check each mark before you cut. Clear, visible lines help you work with confidence, and that calm feeling matters when the brick starts to fly.
Precision For Tight Spaces
Tight corners and window openings ask for a slower, steadier touch, because one small slip can change the fit fast. When you work around these spots, you keep tight tolerances by checking your line often and making micro adjustments as you go. That way, you stay in control and avoid chewing into the brick more than needed.
- Score the edge lightly before the full cut.
- Use a diamond blade that matches your saw.
- Feed the saw in small, calm passes.
- Stop and test-fit the brick before trimming more.
If a corner blocks the blade, turn the block and trim from another side. You’re not alone in the mess of dust and angles; every careful pass brings the opening closer to a clean, snug fit.
Smooth the Cut Edge
Once the brick is cut, the edge often needs a little cleanup, and that step can make a big difference in how the piece fits.
You can use file finishing to knock down rough spots and small chips, then brush off the dust so you can see the true line.
If the edge will stay visible, edge sealing can help protect it from crumbling and keep the finish neat.
Work slowly, and keep the file flat so you don’t round over the shape you worked hard to cut.
A few light passes usually do more than one hard push.
Then test the piece in place.
When the edge feels smooth in your hand, it also tends to look right in the wall, which helps you feel part of the job, not stuck on the sidelines.
When to Call a Masonry Pro
If the cut feels bigger than a simple DIY fix, it may be time to call a masonry pro. You’ll want help when the brick supports a wall, chimney, or steps, because a wrong cut can change the load. A pro can also handle a structural assessment and check permit requirements before you start. That saves you stress and keeps your crew safe.
Call in help if:
- You see cracks nearby
- The brick is load-bearing
- You need many precise cuts
- You’re unsure about tools
You’ll also benefit from a mason when the job needs matching mortar, tight joints, or clean finish work. If your gut says, “this feels risky,” trust it. Getting backup isn’t giving up. It’s smart, and it keeps your project on solid ground.
Frequently Asked Questions
Can a Skill Saw Cut Brick Without Water?
Yes, you can cut brick dry with a skill saw, but you need solid dust control. Use a diamond blade, wear proper protection, and make shallow passes to stay safe while working with your crew.
How Do You Keep a Diamond Blade From Overheating?
Keep the blade cool by pausing often so heat does not build up. Use a light water mist, make slower passes, and maintain the blade by clearing dust, checking alignment, and letting it rest between cuts.
What RPM Should a Skill Saw Use for Brick Cutting?
Use the saw’s speed that matches the diamond blade, usually about 5,000 to 6,500 RPM. The blade type matters more than a specific number, so check the blade label and cut with a steady feed.
Can You Cut Decorative Brick Without Chipping the Face?
Yes, you can cut decorative brick without chipping the face if you apply masking tape first and score the cut line before using the saw. This helps protect the surface and keeps the edge cleaner.
How Deep Can a Skill Saw Cut Through Brick?
A skill saw can cut brick only as deep as its blade allows, usually about 2 to 2.5 inches. For deeper cuts, you may need to turn the brick over or complete the cut through a mortar joint.