What you may not know is that most drill bit clutter starts with size mix-ups, not lack of space. When you set up a smart storage system that fits your bench, your bit set stops turning into a noisy little scavenger hunt. You can sort by type and material, protect the good ones, and keep the right bit close at hand, which makes every project feel calmer and faster.
Choose Drill Bit Storage That Fits Your Workspace
When you choose drill bit storage, start with how you actually work, because the best system is the one you’ll use every day without fuss.
You want a setup that feels natural, so check your bench height, wall space, and how often you reach for bits.
If you move fast, wall-mounted holders can keep you in the flow and support workspace ergonomics.
If your shop feels tight, go vertical and protect vertical clearance with slim racks or shallow cases.
If you carry tools to jobs, choose a portable box that closes tight and stays easy to grab.
You’re not building a museum. You’re building a small system that fits your hands, your rhythm, and your space.
When it feels easy, you’ll keep it that way.
Sort Drill Bits by Type and Size
Start by sorting your drill bits by material, so wood, metal, and masonry bits stay where you can reach them fast.
Then line them up by size, with the smallest in front and the largest in back, so you don’t waste time hunting through the pile.
This simple system keeps your workspace calmer and makes the right bit feel easy to grab when the job suddenly gets tricky.
Sort By Material
A neat drill bit system can save you time, and sorting by material and size makes that system much easier to trust.
When you group steel, masonry, and wood bits together, you stop guessing and start working with calm confidence. Keep coated identification visible, because black oxide or titanium finishes can blend in fast. Then check alloy compatibility so you pair each bit with the jobs it handles best.
You’ll reach for the right tool without digging through a jumbled pile, and that small win feels good. Use clear labels or marked slots, and keep specialty bits close to their matching set.
That way, your storage stays friendly, practical, and ready for the next project. Even a quick glance tells you where each bit belongs, and that builds an easy rhythm.
Arrange By Size
Sorting drill bits by size makes your whole setup feel easier the moment you reach for one. You’ll build a calm, friendly order that saves time and cuts guesswork. Keep larger bits at the back and smaller ones in front so your eye finds the right match fast. That visual hierarchy also supports depth progression, because each row tells you what fits next.
| Size group | Place in storage |
|---|---|
| Large | Back row |
| Medium | Middle row |
| Small | Front row |
| Extras | Labeled side slot |
| Specialty | Separate tray |
Then group by type inside each size, like wood, metal, or masonry. This way, you won’t hunt through a mixed pile, and your hands can move with confidence.
Make a Simple Drill Bit Index
You can make your drill bit index easy to read by labeling each slot or hole with the exact bit size.
Then, color-code the bit types so you can spot wood, metal, and masonry bits at a glance.
This simple setup saves you time, cuts down on guesswork, and keeps your favorite bits from playing hide and seek.
Label Bit Sizes
Marking your drill bits by size turns a messy pile into a tool set you can trust in seconds. Use size stencils or font templates so each label stays clear and easy to read. Write the number on the bit case, drawer, or holder, then match it to the bit itself. You’ll save time and feel less frustrated when the right piece is right where you expect it.
| Size | Label |
|---|---|
| 1/16 | Small |
| 1/8 | Medium |
| 1/4 | Large |
Place the labels in the same order as your index, and keep the spacing even. That way, you and your shop crew can spot the right bit fast. A neat label system helps everyone feel at home at the bench.
Color-Code Bit Types
Now, bring order to the pile by color-coding your drill bit types, so each set stands out at a glance. You can give wood bits blue, metal bits red, and masonry bits yellow, then keep the code the same every time. That steady system helps you feel in control, even when the bench gets messy.
Use painted caps on case lids or the ends of storage tubes, and add small material bands around grouped bits for a quick visual cue. Next, make a simple index card or label strip that matches those colors. Keep it near your rack, so you and your shop crew can grab the right bit without guessing.
With a clear color map, your space feels friendlier, faster, and easier to share.
Label Drill Bit Storage Clearly
Clear labels can turn a messy bit pile into a calm, easy-to-use system.
You can mark each bin, drawer, or slot with clear labels so you know exactly where every bit belongs. Use durable tags that won’t peel, smear, or fade after a few busy shop days. Then write the size, type, and any special use in plain words.
If you sort bits by group, keep each group name on the front and top for fast reading from any angle. You can also add a simple color note under the words, so your hand finds the right spot faster.
When your storage speaks clearly, you spend less time hunting and more time building with the people who get your workflow.
Store Drill Bits by Material
When you sort drill bits by material, you make it easier to grab the right bit and avoid mixing steel, masonry, and specialty sets.
Label each bin clearly so you don’t waste time guessing, and keep harder bits away from softer ones that can get nicked or dulled.
That simple habit helps protect your bits and keeps your storage system working smoothly.
Separate by Material Type
A tidy bit rack starts with one simple move: sort your drill bits by material type. When you match each bit to its job, you protect edges and cut cleaner. You also make material compatibility easier to trust, since steel, masonry, and wood bits each ask for different care. Smart coating selection matters too, because black oxide, titanium, and carbide bits don’t belong in the same loose pile.
- Keep wood bits in one row so their sharp points stay ready.
- Group metal bits together for quick grabs on tough jobs.
- Set masonry bits apart so their carbide tips don’t chip.
This system helps you feel at home in your shop, because everything has a clear place. You’ll waste less time, and your hands will find the right bit fast when the work starts.
Label Bit Storage Bins
Label each bit storage bin by material so you can grab the right one without second-guessing yourself. When you sort steel, carbide, and masonry bits into separate spots, you cut down on mix-ups and make your workspace feel more like yours. Use colorful labels so each bin stands out at a glance, even when the shelf gets busy.
Add icon stickers too, like a metal square, a brick, or a wood grain mark, so you can identify bins fast with no squinting. Keep the labels on the front edge and repeat them on the lid if the bin closes. That way, you and your shop crew can stay in sync.
Clear labels help everyone return bits to the right place, which keeps your storage calm, tidy, and easy to trust.
Prevent Metal Damage
Store drill bits by material, and you’ll protect both the bits and the jobs they help you finish. Keep steel, carbide, and specialty bits apart so they don’t rub, chip, or dull each other. You’ll feel more in control when every type has its own safe spot.
- Steel bits rest in a dry drawer with soft lining.
- Carbide bits sit in a tray with space between them.
- Coated bits stay in a sealed box with humidity control.
Add preventive coatings only after you clean and dry the bits well. Then label each section so you can grab the right set fast. When you group bits this way, you build a shop that feels calm, ready, and easy to trust.
Organize Drill Bits in Drawer Inserts
Tuck your drill bits into drawer inserts, and you’ll turn a messy catch-all drawer into a tool setup that actually helps you work faster. Choose drawer foam or custom inserts so each bit has a snug home, and you won’t waste time hunting. You’ll feel more in control, like the drawer is on your side.
| Bit type | Insert tip |
|---|---|
| Twist bits | Group by size |
| Masonry bits | Keep in one row |
| Spade bits | Set in deeper slots |
| Specialty bits | Label the section |
Because you can see every slot, you’ll grab the right bit fast and put it back right away. That small habit keeps your drawer tidy, your mood calmer, and your workday smoother.
Mount Drill Bit Holders on the Wall
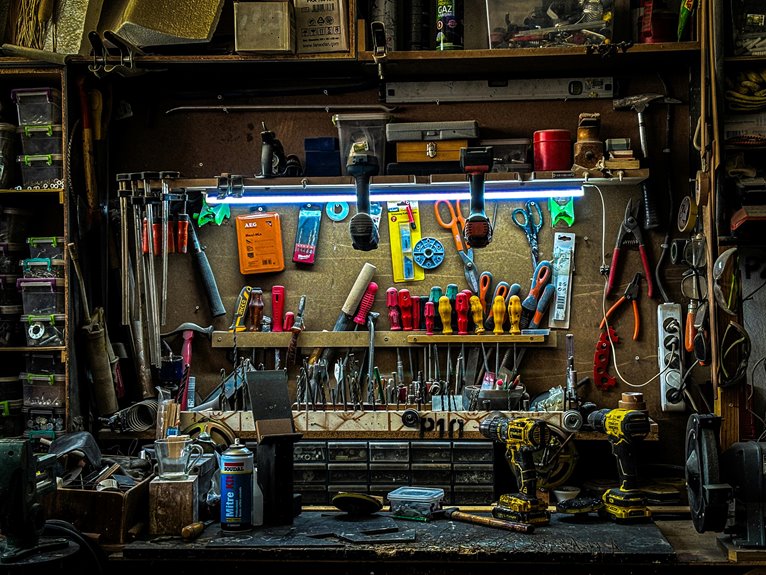
Above your workbench, a wall-mounted drill bit holder can turn clutter into a setup that feels calm and ready. You’ll feel right at home when every bit has a clear place. Mount the holder at eye level so you can grab what you need fast, then free up the bench for the job itself.
Vertical cleats make the rack easy to hang, shift, or replace later. If you like a cleaner look, add magnetic rails beside the holder for quick access to often used sizes.
- A slim board lined with neat bit slots
- A sturdy strip that keeps the row straight
- A bright wall zone that feels organized and welcoming
Use spacing that lets your hand move naturally, and you’ll build a setup that fits your shop and your rhythm.
Keep Small Drill Bits From Getting Lost
Small drill bits disappear fast, especially when they slide off a bench or vanish into a messy tray, so your next step is to give them a home that keeps them in sight.
You can use a clear compartment box, a labeled strip, or a small drawer with tight sections. Keep each size in its own spot so you don’t dig through a pile. If you own extra sets, create backups and store one set elsewhere. Then add tracking tags to the box or drawer label, so you can spot the right bit in seconds. Put the smallest bits in front and return them right after use. When you do that, you stay in control, save time, and feel like your shop actually works with you.
Protect Drill Bits From Rust and Damage
Drill bits can rust sooner than you think, especially when they sit in a damp garage or get put away while still a little wet. You can keep your set ready by using humidity control and by choosing storage that blocks moisture and dings.
After each job, wipe every bit clean, then let it dry before it goes back in place.
- Keep silica gel packs in the box
- Brush off dust before you store bits
- Choose cases with Protective coatings
You can also line drawers with soft foam so metal tips don’t knock together. If you share a shop space, check the storage area often, because a dry, tidy spot helps your gear stay strong and your whole crew feel prepared.
Replace Missing Drill Bits as Needed
Even with a dry, tidy storage setup, a bit can still go missing, and that happens to almost everyone. When you notice one gone, check your replace inventory right away so you don’t keep guessing during the next project.
Count the sizes you use most, then compare them with your labels or bins. If a favorite size is missing, reorder replacements before the job pile grows. That small step keeps your set complete and helps you feel ready, not rushed.
You can also match the new bit to the old one by type and length, so your storage stays neat and familiar. A quick refill now saves you from hunting later, and it keeps your shop feeling like your shop.
Set Up a Portable Drill Bit Kit
Pack a portable drill bit kit that you can trust to grab and go when the job moves away from your main shop. You’ll feel ready when your bits live in a compact case with clear pockets and a tough latch. Keep it small enough for a tool bag, yet organized enough that you don’t waste time hunting.
- Place your most used sizes up front for fast reach.
- Add a few field refills in labeled sleeves.
- Tuck in a cloth so bits don’t rattle loose.
Next, sort the kit by task, not just size. Put wood, metal, and masonry bits in separate rows so you can team up with the right set fast. When you pack this way, you join a crew of makers who show up prepared, calm, and easy to work with.
Maintain Your Drill Bit Storage System
Regular upkeep keeps your drill bit storage working the way you need it to, so you don’t open a drawer full of mixed-up bits and feel that little burst of dread. You stay in control when you do routine inspections each month and wipe away dust, rust, or loose labels. That small habit helps your setup feel like part of your shop, not a mystery zone.
| Check | Why it matters | When |
|---|---|---|
| Bit labels | Faster grabs | Weekly |
| Slot fit | Stops wobble | Monthly |
| Usage tracking | Shows wear | After projects |
Next, replace dull bits, reset missing sizes, and return every piece to its marked spot. When you keep up with it, your system keeps welcoming you back with order and calm.
Frequently Asked Questions
How Can I Store Drill Bits Without Using Drawers?
Mount your drill bits on a magnetic strip or pegboard so each size stays in plain view and within easy reach. This setup frees up space, speeds up sorting, and keeps your workspace tidy and efficient.
What’s a Good Way to Organize Specialty Bits Separately?
Keep specialty bits in labeled vials on a magnetic strip board so each odd shaped piece has a specific spot. That makes it easy to find the right bit quickly.
How Do I Keep Drill Bits Visible at a Glance?
Mount the bits on a labeled pegboard, store them in clear bins, or line them up on magnetic strips. Use color coded holders for each bit type so you can spot the right size quickly and keep everything easy to grab.
Can I Make a Rotating Drill Bit Organizer?
Yes, you can build a rotating carousel on a magnetic spindle. Mount bits in labeled slots, keep sizes grouped, and spin to grab the one you need quickly.
What Storage Works Best for Bits Used on Job Sites?
Jobsite cases work well because they keep bit sets organized and protected, while magnetic belts keep your most used bits within easy reach. That setup helps you stay ready on the jobsite without slowing down.