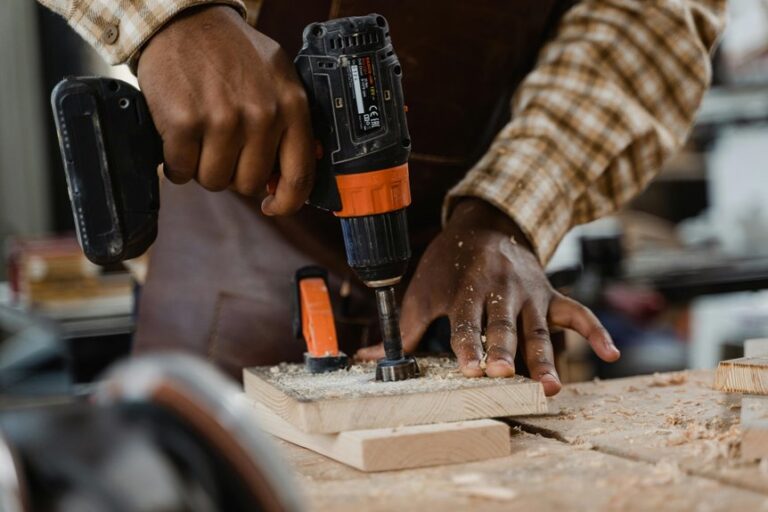
If you want to cut wood with a Dremel rotary tool, you need the right bit, a firm grip, and a calm hand. You’ll get cleaner results when you mark the line, clamp the wood, and let the tool work at high speed with light pressure. Small choices matter here, because the wrong move can scorch the wood fast. Once you know how to set up the cut, the trick is keeping control when the tool starts to sing.
Choose the Right Dremel Bit
Start with the right bit, and the whole job gets easier fast. You’ll want a DREMEL EZ SpeedClic Wood Cutting Wheel for chipboard, hardwood, softwood, laminate, or fiberboard.
If you need detail work or curved cuts, reach for spiral cutting bits. For many wood jobs, the multipurpose cutting kit 565 gives you extra reach and control.
Always check bit compatibility with your mandrel, especially the SC402, so your setup fits without fuss. A good match helps your bit lifespan, keeps cuts cleaner, and saves you from that annoying wobble nobody invited.
If you’re cutting wood often, choose carbide-coated wheels for better durability. With the right accessory in place, you’ll feel more steady, more capable, and ready to make each cut count.
Prep the Wood for a Smooth Cut
A smooth cut begins before you ever switch on the Dremel, so take a minute to prep the wood with care. You’re setting yourself up for a cleaner job, and that matters. Check for knots, loose fibers, and a flat resting spot so the piece stays steady. Respect grain alignment, because cutting with the grain often helps the bit move more predictably. If the wood feels damp, wait and use humidity control so it can dry in a stable room. Then clear dust and chips from the surface.
- Clamp the board firmly.
- Support thin edges to reduce chatter.
- Keep the surface clean and dry.
When you prep this way, you join the crowd of makers who get smoother results with less stress and fewer surprise hiccups.
Mark Your Cut Line Clearly
Three small marks can save you a lot of trouble later. When you mark your cut line clearly, you give yourself a clean target and less room for guesswork. Use a sharp pencil for light wood, or try fine paint guides and visibility aids like tape for darker surfaces. Trace the line slowly so it stays easy to follow, even when the Dremel starts to move fast.
If your cut needs a curve or a short notch, mark both ends first, then connect them with care. Step back and check the line from more than one angle. That quick look helps you spot wobble before it becomes a crooked cut. A clear line helps you work with confidence, and that calm feeling matters when you’re making your wood fit just right.
Secure the Wood Before You Start
Once your cut line is set, keep the wood from moving so the Dremel can follow it cleanly. You’re safer, steadier, and less likely to ruin a good board when you secure it well. Use the right clamp selection for the shape and size of your piece, and place workholding pads between the clamp and wood to protect the surface.
- Tighten the board on a flat, stable bench.
- Check that both ends stay firm when you press lightly.
- Leave the cut area open so your tool can move without snagging.
If the wood shifts, your line can wander fast. When you take a minute to secure it, you make the whole job feel easier, calmer, and more like you’ve got this.
Set Your Dremel to the Right Speed
Speed matters here because the right setting helps your Dremel cut cleanly instead of grabbing the wood and kicking back.
For hardwood and softwood, set a high speed, usually around 20,000 to 35,000 RPM, so the wheel stays steady and the cut feels smooth. If you hear harsh motor noise, back off a little and let the tool settle. Watch the wood, too. If it starts to scorch or the bit chatters, your speed’s off.
Use trigger modulation to fine-tune the pace as you go, especially on thinner pieces or tighter spots. Keep your grip relaxed, trust the tool, and make small adjustments. That way, you’ll feel more in control and more at ease while the cut stays neat.
Start Cutting Wood With Control
Hold the Dremel like you mean it, but not like you’re wrestling a stubborn jar lid. You’re part of the crew now, so trust your grip and keep your wrist positioning steady as the wheel meets the wood. Let the tool bite first, then guide it with light pressure. If you lean on it, the cut can turn messy fast. Keep your breath control calm, because steady breaths help steady hands.
- Start at the edge and ease in slowly.
- Hold the tool with both hands for better control.
- Pause if the wheel feels hot or shaky.
As you move, stay relaxed and focused. The Dremel works best when you steer it, not force it. That way, you protect the wood and your confidence too.
Make Straight Cuts Without Wandering
To keep your Dremel from wandering, mark a clear cut line before you start and give yourself an easy path to follow.
A simple guide, like a straightedge or clamp, helps you stay on track while you cut.
Then keep the tool steady with both hands and let the wheel do the work, because pushing too hard usually makes the cut drift.
Mark Clear Cut Lines
Clear cut lines make the whole job feel calmer, because the Dremel has a path to follow instead of guessing its way through the wood. You help yourself most when you keep proper alignment and boost contrast enhancement, so the mark stands out fast and stays easy to see.
Use a sharp pencil, a fine marker, or tape edge, then check the line from both angles.
- Mark on clean wood so dust doesn’t hide your line.
- Shade the waste side, so you know which part to remove.
- Recheck corners before you start, because a small slip can wander the cut.
When you take a moment here, you build confidence and cut with the same steady rhythm as the rest of the crew.
Use A Guide
A guide takes the pressure off your hands and gives the Dremel a clean lane to follow, so your straight cut stays where you want it instead of drifting off like a shopping cart with a bad wheel.
You can clamp an edge guide to the board, or set up an alignment jig if you want repeatable cuts on the same size piece. Then you simply run the wheel against that fence and let it keep your line true.
This small setup helps you feel like you belong in the shop, because the tool stops fighting you and starts following your plan.
It also saves time on trim, flooring, and project parts where clean edges matter. Keep your mark visible, and check the guide before each pass.
Keep Tool Steady
Keep the Dremel steady with both hands, and your cut will stay much easier to control. Brace your elbows near your body, and let your wrists guide the line instead of fighting it. A little wrist support from the table edge can help when you’re trimming thin wood. The bit should glide, not push. If you lean too hard, the tool can wander and leave a messy edge.
- Keep your grip firm but relaxed.
- Use vibration dampening gloves or pads if the tool feels twitchy.
- Move at a slow, even pace, and follow your marked line.
When you stay calm and steady, you’ll feel more in control, and your cut will look cleaner too.
Cut Curves and Small Notches
Curves and small notches can feel tricky at first, but your Dremel makes them much easier to handle when you slow down and guide it with care. Trace the line first, then start with a spiral bit or a small cutting wheel for clean control. Move in short passes, and let the tool follow the shape instead of forcing it. This helps you cut fretted patterns and ornamental inlays with a neater edge.
If the notch is tight, nibble at it from the waste side until you reach the mark. Keep both hands on the tool, and adjust your angle as the curve turns. With a little patience, you’ll shape corners that look crisp and fit right into your project.
Use a Light Touch on Thin Wood
When you cut thin wood, the best move is often the softest one. You belong in the group of makers who let the tool stay calm and steady. Use feather light pressure so the wheel doesn’t dive or wander. With micro depth control, you guide each pass and keep the cut honest.
- Grip the Dremel with both hands for a settled feel.
- Start with a shallow pass, then check the line before you go deeper.
- Let the wheel glide, and give it room to move without forcing it.
That gentle approach helps you stay in control, especially on narrow stock or delicate project parts. When you work this way, the cut feels smoother, and you feel more confident too.
Prevent Burn Marks and Splintering
A clean cut starts with the right pace, because burn marks and splintering usually show up when the tool works too hard or too fast. You can avoid that by matching the RPM to the wood and letting the bit glide instead of forcing it.
Keep both hands on the tool, and use steady, light pressure so the wheel stays in control. If the wood starts to warm up, pause for cooling techniques like a short break or a quick air blast.
Choose sharp, carbide-coated accessories for better abrasion prevention, since dull edges chew at fibers. Also, score the cut line first on delicate boards, then follow it with calm, even passes. That’s how you protect the wood and keep your cut looking clean.
Smooth Rough Edges After Cutting
Refine the cut by smoothing the edge right after you finish, because that small step makes the whole project look cleaner fast. You can keep your piece looking polished by brushing away fuzz, then shaping the edge with a sanding band. Work with grain alignment so the surface feels natural, not scratched up.
- Start with light passes and let the tool glide.
- Switch to a finer abrasive for softer touch.
- Finish with edge sealing if the wood will get handled often.
You don’t need fancy moves here, just steady hands and a little patience. As you smooth each edge, your cut starts to feel like part of the design, and that’s the kind of finish that makes you proud to show it off.
Stay Safe While Cutting Wood
You should wear eye protection before you start, since wood chips can fly fast and surprise you.
Next, secure the wood firmly so it won’t shift while you cut, because a steady piece gives you better control and cleaner lines.
Then set a cutting speed that matches the material, and let the tool work at its own pace so it doesn’t jump or bite into the wood.
Wear Eye Protection
Eye protection should always come first when you cut wood with a Dremel, because tiny chips and dust can fly faster than you expect. When you wear safety goggles or impact resistant eyewear, you give your eyes the shield they need, and you stay confident while you work. You’re part of a safer DIY crowd when you make this habit automatic.
- Choose goggles that fit snugly and don’t slip during cuts.
- Keep the lenses clean so you can see your cut line clearly.
- Replace scratched eyewear before it blurs your view.
That small step helps you focus on the task, not on blinking away debris. It also keeps your hands steady, since you won’t tense up when dust starts moving.
Secure The Wood
Clamp or brace the wood before your Dremel ever touches it, because a loose board can twist fast and turn a simple cut into a shaky mess. You’ll feel steadier right away when the piece stays put.
Use workholding clamps on a flat surface for small parts, or lock the stock in a bench vise when you need both hands free. Make sure the jaws grip firmly, but don’t crush the grain. If the wood can shift, add a scrap block or backing board so the edge stays supported. Then check that the cutting line hangs clear of the clamp path. That little pause saves you from surprise slips and helps you stay in control.
Once the wood’s secure, you can focus on clean, confident cutting with your crew mindset intact.
Control Cutting Speed
Once the wood is locked down, the next job is to control the Dremel’s speed so the bit cuts cleanly instead of skittering across the surface. You’ll feel more in control when you start high enough for the material, then ease off if the cut gets hot or noisy.
Good speed modulation keeps the line neat and helps you stay calm, even on a tricky edge.
- For hardwood and softwood, aim for 20,000 to 35,000 RPM.
- Use light pressure so torque management stays smooth and the tool doesn’t jump.
- If the bit starts to chatter, slow down and let it recover.
This simple rhythm helps you and the tool work together, which makes every cut feel safer and steadier.
Frequently Asked Questions
Which Dremel Accessory Cuts Laminate Best?
You’ll get the cleanest laminate cuts with a carbide wheel, especially the DREMEL EZ SpeedClic Wood Cutting Wheel. A diamond disc can also work, but carbide cuts laminate more cleanly and quickly.
How Do I Change Dremel Bits Quickly?
You can swap bits in seconds with EZ SpeedClic, which is up to 6 times faster than standard mandrels. Use a quick release adapter or a magnetic bit holder, then pull, twist, and release to keep working smoothly.
Can a Dremel Cut Wooden Floors for Pipes?
Yes, a Dremel can cut wooden floors for pipes if you use the correct wood cutting wheel and keep the tool steady. It is useful for small, controlled cuts when routing pipes or salvaging floor sections.
What RPM Is Best for Softwood Versus Hardwood?
You’ll usually run softwood and hardwood between 20,000 and 35,000 RPM. Start at the lower end, then increase speed if needed. Feed rate and bit geometry affect the result, so let the bit cut smoothly rather than pushing it.
Which Bit Is Best for Curved Detail Cuts?
For curved detail cuts, spiral router bits or fine cutting burrs work well. They let you follow tight curves smoothly and deliver controlled, clean results.