A steady hand on a wrench can feel like a key turning a locked door, and you can still measure the force behind it without a torque wrench. By using torque’s simple rule, T = F × r, you can turn a rough guess into a solid number. You’ll learn how to set the lever length, find the right force, and avoid the small mistakes that throw off the result, so the next turn feels a lot less uncertain.
What Torque Means for Fasteners
When you tighten a fastener, you aren’t just turning a nut or bolt, you’re stretching the joint so it can hold parts together with the right grip. That stretch creates clamp preload, the squeezing force that keeps pieces from slipping when loads change.
You don’t see it, but you feel its effect in a solid, confident fit. Joint stiffness matters too, because a stiff joint resists movement and holds preload better under vibration.
If you under-tighten, parts can loosen. If you over-tighten, you can damage threads or parts. So you’re balancing grip, stretch, and safety.
When you understand this, torque starts to make sense as more than force on a wrench. It becomes your way to build trust in every connection.
Gather the Tools You Need
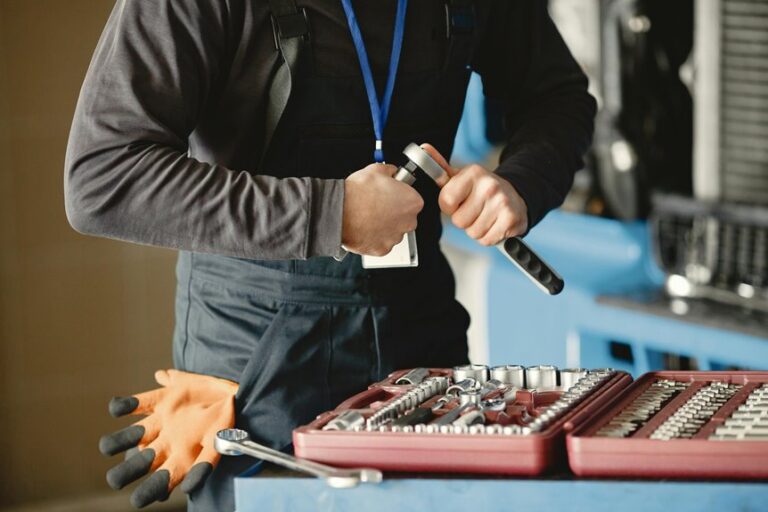
A good no-torque-wrench setup starts with the right tools, because guesswork gets old fast, and fasteners rarely forgive it. You’ll want safety gear first, so grab gloves and eye protection before you touch the job.
Next, choose a sturdy wrench or breaker bar that won’t flex much under load. Add a calibrated ruler or tape measure, since you need a clear, exact arm length you can trust.
It also helps to keep a marker nearby for your reference point. If you’re using hanging weight, pick a strong cord or hook that won’t slip.
Keep a notepad handy too, because a few careful numbers make you feel part of the crew, not lost in it. With these basics ready, you’re set to work cleanly and confidently.
How to Estimate Torque Without a Wrench
When you don’t have a torque wrench, you can still get close by trusting your hand feel and the way the fastener resists as you tighten it.
You can also use turn angle estimation, since a known extra turn after snugging often gives you a more consistent result.
Together, these methods help you tighten with more confidence, even when the right tool isn’t nearby.
Hand Feel Method
Trusting your hand can work surprisingly well, but only if you treat it like a skill you build, not a guess you hope will land.
You learn by repeating the same bolt, same wrench, and same pull until muscle memory kicks in. As you tighten, notice the tactile cues: the first easy spin, the growing drag, and the point where the joint feels snug instead of loose.
Keep your grip steady and use the same stance each time so your body learns one pattern. Practice on scrap parts first, because a cheap mistake beats a snapped fastener.
Also, compare your feel to known torque values when you can. That way, your hand becomes a friend you trust, not a rulebreaker in disguise.
Turn Angle Estimation
If your hand feel has gotten you close but not quite exact, turn angle estimation gives you a more reliable next step. You tighten the bolt until it seats, then you add a measured turn with angle indicators or simple visual benchmarks.
Mark the wrench handle and the socket, or use the bolt head and a fixed point nearby, so you can see a quarter turn, half turn, or the exact degrees the spec calls for. This method helps you stay in the same groove with other mechanics and avoid the guesswork that can sneak in when threads feel different.
Keep the pull smooth and steady, because jerky motion throws off the reading. When the joint needs consistency, angle-based tightening gives you a solid path without fancy gear.
Use a Lever and Known Weight
Grab a lever, add a known weight, and you can estimate torque without fancy tools. Start with lever calibration so the arm length is exact, then hang a known mass at a right angle.
- Measure from the bolt center to the weight point.
- Keep the lever level and steady.
- Use a rigid setup so nothing slips.
- Repeat the test at the same mark.
When you do this, your group can trust the result more because the load stays predictable. A hanging mass gives you a calm, repeatable pull, which feels a lot better than guessing. If the arm is twice as long, the twist grows too. So you can adjust the weight or distance until the wrench feels right, and you’ll stay in control together.
Apply the Torque Formula
You can use the torque formula, T = F × r, to turn a simple push or hanging weight into a clear torque value.
First, measure the force you apply and the exact perpendicular distance from the bolt to that force point.
Then multiply them to see the torque you’re creating, which helps you tighten with far more confidence.
Torque Formula Basics
Torque starts with a simple idea: force applied at a distance creates turning power. You can trust the formula T = F × r, where F is your force and r is the lever arm. If you stand farther out on the bar, torque rises fast. Use these steps:
- Pick the force you can apply.
- Measure the lever arm from the bolt center.
- Multiply force by distance.
- Check units conversion so pounds and feet, or newtons and meters, stay matched.
That’s the whole trick, and you’re not alone if it feels new. A 180-pound push on a 2.5-foot bar gives 450 ft-lb. Keep the pull square to the bar, and the math stays clean. When you know the formula, you can work with confidence.
Measure Force And Distance
First, measure the force you can actually apply and the exact distance from the bolt’s center to where that force hits the wrench. That gives you the real setup, not a guess.
Use force mapping to note whether you’re pushing with body weight or hanging a known load.
Then do distance calibration by marking the wrench where your hand, foot, or weight lands. Keep the pull square to the wrench, because angled force steals torque.
When you match force and distance cleanly, the math stays simple: torque comes from multiplying them.
If the bar flexes or your grip shifts, measure again. Small changes matter, and your group gets better results when everyone uses the same mark and stance.
That shared method builds confidence, and it keeps the work steady.
Calculate Required Torque
Now that you’ve measured the force and marked the distance, the next step is to work out the torque you need. You’re not guessing here. Use T = F × r, then keep the units matched so your numbers stay honest. If you know your body weight or hanging mass, multiply it by the arm length to estimate the pull on the fastener. That helps with torque distribution and preload estimation, so the joint clamps the way you want.
- Write down the force.
- Measure the perpendicular distance.
- Multiply them.
- Check the unit.
If the bar angle changes, your usable torque drops, so stay square to the fastener. A steady setup makes you feel part of the crew, not the guesswork club.
Convert Torque Units Correctly
If you switch between imperial and metric units, the math can go sideways fast, so it helps to convert everything before you tighten a bolt. You’re part of the crew when you keep one system straight. Use unit conversion first, then check decimal precision so your torque estimate stays honest.
For example, foot-pounds won’t match newton-meters, so don’t mix them on the same job card. If your wrench length is in inches, turn it into feet or meters before you multiply force by distance. That small step keeps your numbers steady and your hands confident. When you write the result, label the unit clearly and round only at the end. That way, you avoid sneaky errors and keep the whole team on the same page.
Estimate Torque by Bolt Size
Bolt size gives you a solid starting point when you need a torque estimate without a torque wrench. You and your crew can use thread diameter and grade to narrow the range fast, so nobody feels stuck guessing alone. Start with manufacturer charts, then compare the joint’s purpose and load.
- Match the bolt diameter to a trusted torque chart.
- Check the bolt grade, because strength changes the target.
- Lower the estimate if corrosion-effects on fasteners may add drag.
- Treat torque-to-failure testing data as a ceiling, not a goal.
That way, you stay close to safe clamp load without pushing past the joint’s limits. If the fastener sits in a critical spot, choose the lower end of the range and move slowly.
Check Tightness by Bolt Type
When you check tightness by bolt type, you don’t treat every fastener the same, because a hex bolt and a flange bolt can feel different as they seat.
You’ll want to watch how each one clamps down, since the head shape and washer area change how the load spreads. That little difference can save you from guessing wrong and ending up with a joint that’s either too loose or way too cranky.
Hex Bolt Tightness
- Match the bolt grade to the maker’s chart.
- Snug it first, then pause.
- Turn slowly and watch for stretch or binding.
- Stop when the feel changes in a steady, firm way.
If the bolt is small, it should tighten lighter. If it’s a high-strength hex bolt, it may need more care and less guesswork. When you work this way, you stay in the same trusted crew of people who respect the joint and protect the parts.
Flange Bolt Check
At the flange, the bolt type tells you a lot about how tight it should be and how it should feel as you work. During flange inspection, match each bolt to its grade and size before you judge anything by hand.
| Bolt type | Feel | Check |
|---|---|---|
| Hex | Firm | Snug, then test |
| Flange | Steady | Watch gasket compression |
| Stud | Even | Recheck in order |
You’ll feel a flange bolt stop with a smooth, solid pull, not a gritty one. If it keeps turning too easily, the joint may need more load. If it fights fast, stop and look for cross-threading or dirty threads. Then compare the next bolt, because nearby fasteners often tell the same story. As you move around the flange, keep the pattern even so the gasket compression stays balanced. That’s how you keep the whole crew in sync.
Avoid Common Torque Mistakes
Even a simple torque job can go wrong fast, so it helps to spot the usual mistakes before you start. You and your crew can stay on track when you watch for human factors and environmental conditions that skew your effort.
- Keep the pull square, because angled force cuts torque.
- Match units and bar length, or your math slips.
- Hold the same stance each time, so body weight stays steady.
- Check for grit, rust, or soft footing before you lean in.
A small setup change can throw off the reading, and that’s where many good hands get tripped up. So, mark your grip point, stay calm, and use the same motion each time.
That way, you work with your team, not against guesswork.
Stop Tightening at Proper Tightness
Proper tightness matters because more force isn’t always better, and you can damage a part fast if you keep turning after the joint is already seated. You want the fastener snug, then you stop. Watch for the point where resistance rises sharply and the parts stop moving together. At that moment, extra pull can stretch threads, crush seals, or warp a washer.
If you used a chart or feel method, stay honest with the mark you reached. Then do a quick post‑assembly inspection for gaps, crooked hardware, or squeeze-out. That check helps you trust torque retention without chasing the fastener tighter. In your shop, that discipline keeps the whole crew safer and your work looking clean, which feels good every time.
Verify Torque After Assembly
After you tighten a fastener, you should always verify it, because a joint can feel right and still be off by a little. You’re not being fussy; you’re protecting the work you already did. Use the same setup, then check the torque again after the parts settle.
- Recheck the fastener soon after assembly.
- Look for load relaxation in soft gaskets or fresh threads.
- Check again after thermal cycling if heat changes the joint.
- Keep your force and lever arm the same so your reading matches.
If the value drifted, reset it with care and test once more. That simple habit helps you stay in the crew, because solid work gets noticed. It also keeps surprise failures from sneaking into your day, and nobody likes that kind of drama.
Frequently Asked Questions
How Do Angled Pulls Affect Torque Calculation?
Angled pulls lower torque because only the perpendicular component of the force creates turning effect. Use the effective lever arm, not the full wrench length, so a pull at an angle produces less torque than a straight pull.
Can Body Weight Be Used Safely on a Breaker Bar?
Yes, you can use body weight on a breaker bar if the tool is rated for the torque and the socket is fully seated. A 180 pound person applying force at the end of a 2.5 foot bar creates about 450 ft lb. Keep the bar steady, brace the vehicle or part securely, and avoid sudden bouncing.
What if the Wrench Handle Flexes Under Load?
Handle flex reduces the torque that reaches the fastener because part of your force bends the wrench. If you see the shaft bending, use a shorter handle, switch to a stiffer wrench, and keep your pull steady from one try to the next.
How Accurate Are Angle-Of-Turn Tightening Methods?
Angle of turn tightening can be reliable when the threads are clean and each turn is applied consistently, because it depends on controlled thread stretch. Still, it is best treated as a practical method, not a perfect one.
What Alternatives Exist Besides Hanging Weights?
You can use a beam type wrench, torque angle gauge, calibrated lever, or digital adapter instead. You can also use friction estimates and snug plus turn methods to tighten with confidence alongside your crew.