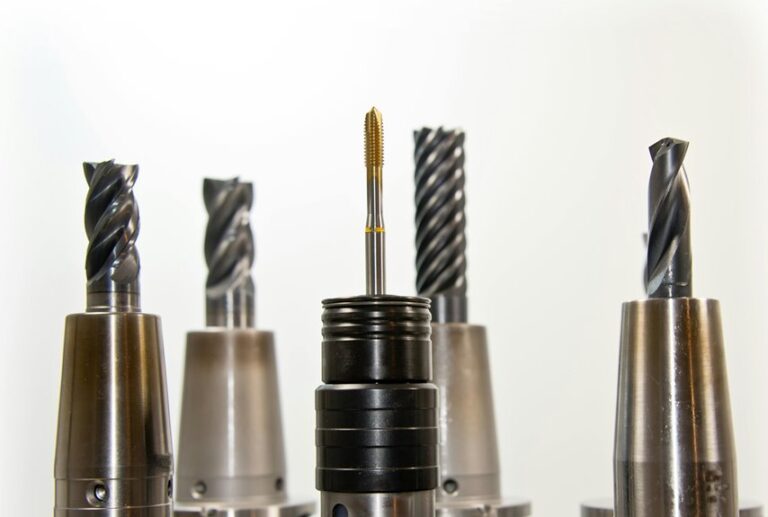
Using nail drill bits well starts with the bit you choose, because the right grit, material, and shape can make your work safer and cleaner. You’ll prep the nail, guide the bit with light control, and shape without pressing into skin or heat. Then you’ll refine the cuticle area, handle product removal, and finish by cleaning and storing each bit the right way. Once you know how each part connects, the process gets a lot easier.
Choose the Right Nail Drill Bit for Each Task
When you choose the right nail drill bit for the task, the work feels easier, safer, and much more controlled. You can build trust in your tools by checking grit matching choices first. Fine grits suit natural nails, while coarse bits help with acrylics and gel.
Next, look at material compatibility tips so the bit works well with the product you’re removing or shaping. Carbide handles tough enhancement work, diamond gives you precise control near edges, and ceramic feels smooth for steady filing.
Then match the shape to the job. Barrel bits shorten and shape, flame bits reach tight cuticle zones, and bullet bits help with delicate finishing. When you pair the right bit with the right surface, you work with confidence and fit right in.
Prep Nails for Safe Nail Drill Bit Use
Now that you know how to match the right bit to the job, you need to prep the nail and the tool before you start. Wash your hands, dry the nails, and clear away oils so the bit can work smoothly. Gently push back loose skin and protect the skin barrier by avoiding pressure on soft tissue.
Then do tool inspection: check the bit for chips, rust, or bent edges, and make sure it’s locked in place. If you use a sanding band, seat it snugly. Set your drill to a low speed first, because control matters more than speed when you’re learning. When your space feels calm and your tools feel ready, you’ll work with more confidence and less worry, and that makes every set feel easier.
Use Nail Drill Bits for Shaping
When you shape nails with a drill bit, you need the right tip and a gentle hand so you can refine the edge without overdoing it.
A barrel bit can help you shorten and smooth, while a cone or flame bit gives you better control around curves and tight spots.
Precision Shaping Techniques
Precision shaping starts with choosing the right nail drill bit for the job, because the bit you pick decides how smooth, safe, and clean your results will be.
You can guide the edge with contour mapping, tracing the nail’s curve before you touch the surface. Then use light micro sculpting strokes to refine the apex, sidewalls, and free edge without rushing. Keep your hand steady and let the bit do the work, so you stay in control and your shape looks polished, not overworked.
Move in short passes, check your angle often, and switch sides as needed for balance. When you shape this way, you join the pros who make neat, even nails that feel finished and confident.
Bit Selection Guide
Picking the right nail drill bit can make shaping feel a lot easier and a lot less stressful. When you choose by task, you stay in control and your nails stay safer.
For natural nails, go with fine or medium bits, because they smooth without chewing up the surface. For acrylic or gel, use a coarser bit for faster shaping and shortening. That grit comparison helps you match the tool to the job.
Next, check material durability. Carbide lasts long and cuts fast, while diamond bits give you gentle precision. Ceramic runs cooler, which feels nicer during longer sessions.
If you’re new, a safety bit or sanding band can help you build confidence. With the right match, you’ll feel like you belong at your own nail table.
Refine Cuticles and Sidewalls
To refine cuticles and sidewalls safely, start with the right nail drill bit and let the tool do the work for you. Choose a flame or bullet bit with a fine grit, then stay in light contact so you don’t press into skin.
You’ll get cleaner lines when you move slowly along the cuticle pocket and sidewalls, keeping the bit angled away from the nail plate. If you’re new, skin friendly tools with rounded tips can help you feel steadier and more confident.
Keep your hand relaxed, and pause often to check your work. After the area looks neat, apply cuticle oiling to soothe the skin and keep it soft. That small habit helps your nails look polished and cared for.
Remove Product Without Damaging Nails
When you need to remove old product, let the drill ease it off instead of forcing it off. You’ll protect the nail plate when you pick the right carbide or safety bit and keep your touch light. Work in thin layers, and let the bit do the work.
If the surface warms up, pause and check temperature monitoring, because heat can sting fast and make you rush. For extra buildup, pair the drill with gentle solvent stripping so you soften the product first, then remove less with the bit. Stay near the middle of the nail, and avoid digging into the edges. That way, you keep control, save time, and leave your nails ready for the next step without that rough, overworked feeling.
Clean and Store Nail Drill Bits Properly
After you finish removing product, your drill bits need a careful clean so they stay safe, sharp, and ready for the next nail service. You belong in a routine that keeps your kit trusted and tidy.
First, brush away dust, then wash bits with warm soap and water, and follow approved sterilization methods for metal bits. Dry each one fully, because trapped moisture can dull tools and invite trouble.
- Use a soft brush for grooves.
- Soak only if the bit type allows it.
- Check for wear before you put it back.
- Keep bits in labeled storage containers.
- Separate clean bits from used ones.
When you store them well, you protect your work and your clients, and your next set starts smoothly.
Frequently Asked Questions
Which Nail Drill Bit Works Best for Beginners?
A rounded safety carbide bit is a strong choice for beginners because it is easier to control and helps reduce the risk of skin contact. Start with slow, steady practice, use proper safety steps, and choose a softer rounded tip for gentler shaping with less chance of accidental damage.
What Shank Size Fits Most Electric Nail Drills?
3/32 inch shank fits most electric nail drills, and 2.35 mm adapters can be used when needed. This size offers a practical fit for a simple, versatile setup.
How Do I Tell Grit Levels by Bit Color?
You can identify grit by the color bands on the bit. In many cases, lighter bands indicate finer grit, while darker bands indicate coarser grit. To confirm the exact grit, check the packaging because shades can differ by brand and bit style.
Can I Use Sanding Bands on Natural Nails?
Yes, but use them with care on natural nails. Choose fine, single use bands for prep and keep the pressure light to protect the nail surface.
What RPM Is Safest for Cuticle Detailing?
You’ll stay safest around 3,000 to 5,000 RPM for cuticle detailing, using low RPM and high torque so you can control the bit without forcing it. That keeps your work gentle, precise, and professionally consistent.