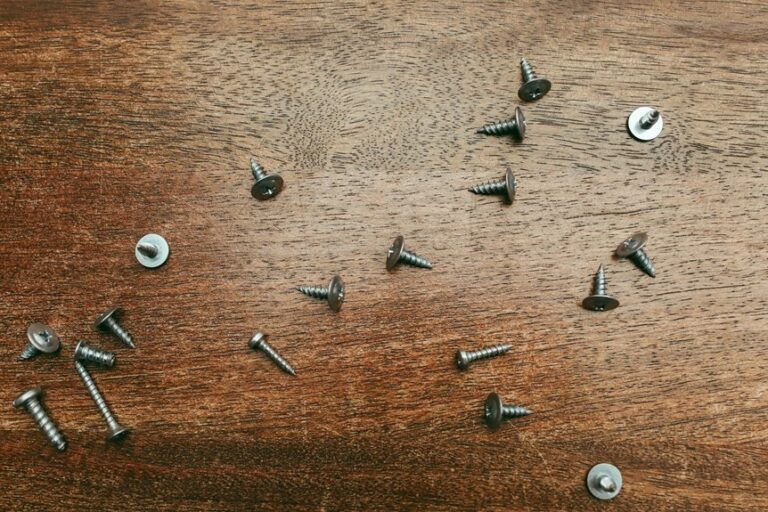
The right trim nail can make your project look polished instead of patched. If you pick the wrong gauge or length, you may get splits, loose boards, or nail heads that stick out like tiny road bumps. You’ll want to match the nail to the trim’s thickness, the wood’s hardness, and the room for a clean finish, because the best choice for baseboards isn’t always right for crown molding.
What Size Nails for Trim Finishing?
Choosing the right nail size for trim finishing makes the job smoother, cleaner, and far less frustrating.
You usually want 15- or 16-gauge finish nails for most trim, because they grip well and still leave small holes.
For thinner pieces, 18-gauge brads can work, but they’re best for delicate molding, not heavier baseboards.
Match the length to the trim thickness, and aim for nails about three times as long as the material is thick. That helps your trim stay put through seasonal expansion.
It also supports paint adhesion, since smaller, neater holes need less patching.
If you’re unsure, choose a nail that gives solid hold without splitting the wood. That way, you fit in with a cleaner, more polished finish.
Pick the Right Nail Gauge
You’ll get better results when you match the nail gauge to the trim’s weight and thickness.
Lower-gauge nails like 15 or 16 hold stronger for baseboards and casings, while 18-gauge brads work better for small, delicate pieces.
If you pick the wrong gauge, you might get weak holding power or tiny splits, and nobody wants a trim job that acts fussy.
Nail Gauge Basics
When you pick the right nail gauge, the job gets easier fast because the nail does the work without tearing up your trim. You’ll usually choose 15, 16, or 18 gauge, and each one changes the nail diameter and grip.
Thicker nails bite harder, so they suit denser stock and wider moldings. Thinner nails leave smaller marks, which helps when your trim feels delicate.
For good material compatibility, match the gauge to the wood’s hardness and the trim’s width. If you’re working on light pieces, a smaller gauge can keep splits away. If your trim needs a stronger hold, move up a size. That way, you stay in control, your cuts look clean, and your finish feels like part of the room.
Choosing Proper Gauge
Picking the right nail gauge does more than hold trim in place, because it also shapes how clean the final work looks.
You’ll usually want 15- or 16-gauge nails for baseboards, casings, and crown because they give you a firm grip without looking bulky.
For delicate pieces, 18-gauge brads work better since they leave smaller holes and help prevent splitting.
When you match the gauge to the trim’s thickness, you protect the wood and make your finish look like it belongs there.
Check material compatibility before you fire a nail, and think about environmental factors too, especially if moisture or temperature can shift the wood.
That simple habit helps you avoid loose joints, ugly dents, and the kind of trim that keeps everyone guessing.
Choose Nail Length by Trim Thickness
Start with the trim itself, because its thickness decides a lot more than most people expect. You want the nail to reach solid wood, but not burst through the face.
For thin trim, use shorter finish nails so you don’t split the piece or leave ugly poke-through. As the trim gets thicker, step up the length so the nail grabs the wall and holds steady.
Check grain direction before you drive, because it can change how cleanly the nail enters. Also think about adhesive selection, since glue can help lighter trim stay snug with a shorter nail.
When you match nail length to trim thickness, you work cleaner, feel more confident, and fit right in with the folks who know the job looks best when it stays tight and neat.
Use 15-Gauge Nails for Thick Trim
Reach for 15-gauge nails when your trim gets thick, heavy, or a little stubborn, because that extra strength makes a real difference. You’ll feel calmer when the nail grips hardwood trim without wobble, especially in heavy duty applications where weaker fasteners can bend or back out. If you want a simple guide, use this:
| Trim type | Best pick | Why it helps |
|---|---|---|
| Thick casing | 15-gauge | Strong hold |
| Hardwood trim | 15-gauge | Less flex |
| Wide base | 15-gauge | Better grip |
That thicker wire gives you confidence, and it helps your work look settled, clean, and ready to belong in the room. When the trim fights back, you don’t have to. Pick the stronger nail, set it straight, and keep moving with ease.
Use 16-Gauge Nails for Most Trim
A 16-gauge finish nail is the dependable middle ground for most trim work, and that makes your job a lot easier. You get solid holding power without making the holes feel oversized, so your trim looks clean and settled. When you pick nails, check material compatibility first, because pine, MDF, and hardwood each react a little differently. Keep your tool maintenance routine steady too, since a clean nailer drives straighter and saves you from annoying jams.
- Use 2 to 2.5 inch nails for baseboards and crown.
- Match the nail length to trim thickness.
- Choose 16-gauge for casings and general molding.
- Keep your nailer and nails matched for smooth firing.
That way, you stay in the same crew of confident DIYers who want neat results without extra drama.
Use 18-Gauge Brad Nails for Delicate Trim
If 16-gauge nails feel like the steady workhorse for trim, 18-gauge brad nails are the gentler choice when the wood is thin and easy to split.
You can use them on delicate trim, small moldings, and delicate restoration work where you want the piece to stay intact and look clean. Their slim shank leaves tiny holes, so you’ll spend less time filling and sanding. That also helps paint adhesion, since smoother surfaces take finish better and keep details crisp.
Choose a brad long enough to bite well, but not so long that it risks damage behind the trim. When you’re working carefully, these nails help you feel confident, welcome, and in control.
Match Nails to Baseboards and Casing
For most baseboards and casing, 15-gauge or 16-gauge finish nails give you the best mix of strength and a neat look. When you pick the right size, you help the trim sit tight and feel like it belongs in your room.
- Use 2-inch to 2.5-inch nails for typical baseboards.
- Choose 16-gauge when you want strong hold with smaller holes.
- Match nail length to trim thickness and drywall.
- Check paint adhesion after filling holes, so the finish blends well.
You’ll also avoid ugly gaps at floor junctions, where trim gets bumped the most.
If your casing is thinner, stay with lighter nails only when they still grip well. That way, your work looks clean, holds firm, and feels finished without giving you extra touch-up stress.
Choose Nails for Crown Molding
Since crown molding sits high on the wall and often covers wider trim, you’ll usually want the same strong hold you’d use on baseboards, but with a little more care for the angle and edge. Choose 15- or 16-gauge finish nails for most crown work, because they grip well and still fit cleanly in ornate profiles. For lighter pieces, 18-gauge brads can work, but they suit only small moldings. Use a nail length around 2 to 2.5 inches so you get solid bite into framing.
| Need | Choice |
|---|---|
| Wide crown | 16-gauge |
| Heavy profile | 15-gauge |
| Small detail | 18-gauge |
| Standard length | 2 to 2.5 inches |
| Tight fit | Match installation angles carefully |
That way, you get a cleaner fit and a room that feels finished.
Prevent Splits and Blowouts
A clean trim job starts before the nail even goes in, because the wrong size or angle can split the wood and leave a messy blowout that nobody wants to stare at every day. You can dodge that headache when you read the wood grain and choose a thinner nail for delicate spots. For painted finishes, that matters even more.
- Keep nails in line with the grain.
- Leave thin edges alone when you can.
- Test on scrap before you commit.
- Use steady pressure, not brute force.
When you work this way, you protect the face of the trim and keep the surface looking calm and shared, like it belongs in your home. Small care now saves you from patching ugly chips later, and your trim will feel more polished.
Set Nails for a Clean Trim Finish
Set the nail, not your patience, and you’ll get a trim line that looks calm and finished instead of dented and rushed. You want the head just below the surface, so the trim stays tight and ready for paint compatibility. Aim for steady pressure, and let the nailer do the work. If your trim has adhesive backing, hold it snug before you drive the nail, because the fastener should lock the piece in place, not shift it.
| Action | Result |
|---|---|
| Set nail flush | Clean look |
| Angle slightly | Better hold |
| Use right gauge | Less damage |
| Check depth | Easier finish |
That small, careful move helps your trim feel like it belongs in the room, and you’ll notice the difference fast.
Fill Holes and Hide Nail Marks
Bringing those tiny nail marks to a clean finish is easier than it looks, and it can make the whole trim job feel polished instead of patched. You don’t need fancy gear, just a little patience and the right touch. After you sink and set the nails, press in wood filler techniques that match your trim, then smooth it flush.
- Pick filler that suits painted or stained wood.
- Push it in firmly so it bonds well.
- Let it dry before you sand.
- Finish with paint touchups that blend the spot.
When you work carefully, the holes fade fast and the trim starts to feel like it belonged there all along. That small repair can quietly pull the whole room together.
Frequently Asked Questions
Can I Use Galvanized Nails for Interior Trim?
Yes, galvanized nails can be used for interior trim. They resist corrosion, but the coating can be noticeable at cut ends. For a cleaner look, use finish nails that match the trim and fill the holes carefully.
Do Nail Sizes Differ for Painted Versus Stained Trim?
No, you’ll usually use the same nail sizes. The finish matters more for paint adhesion or stain penetration. Painted trim lets you fill nail holes more easily. Stained trim works best with smaller nails so the holes stay less visible.
Should I Use Angled or Straight Finish Nails?
Use angled finish nails if your nailer needs better access in tight corners; straight finish nails work well for most trim work. Choose the nail style that matches your nailer and the way you like to install finish pieces.
What Nailer Works Best for Trim Finishing?
You’ll usually get the cleanest trim finish with a pneumatic nailer. For delicate molding or thin stock, a cordless brad nailer is a strong choice. Picking the right tool for the trim helps reduce splitting and gives you a neater result.
How Do Humidity Changes Affect Trim Nail Choice?
Humidity changes can make trim expand and shrink, so choose longer 15 or 16 gauge finish nails and keep moisture barriers in place. That helps the trim stay secure when wood movement tries to open seams or create gaps.